
15/05/2020 C-Sharp Scripting Basic
20/05/2020
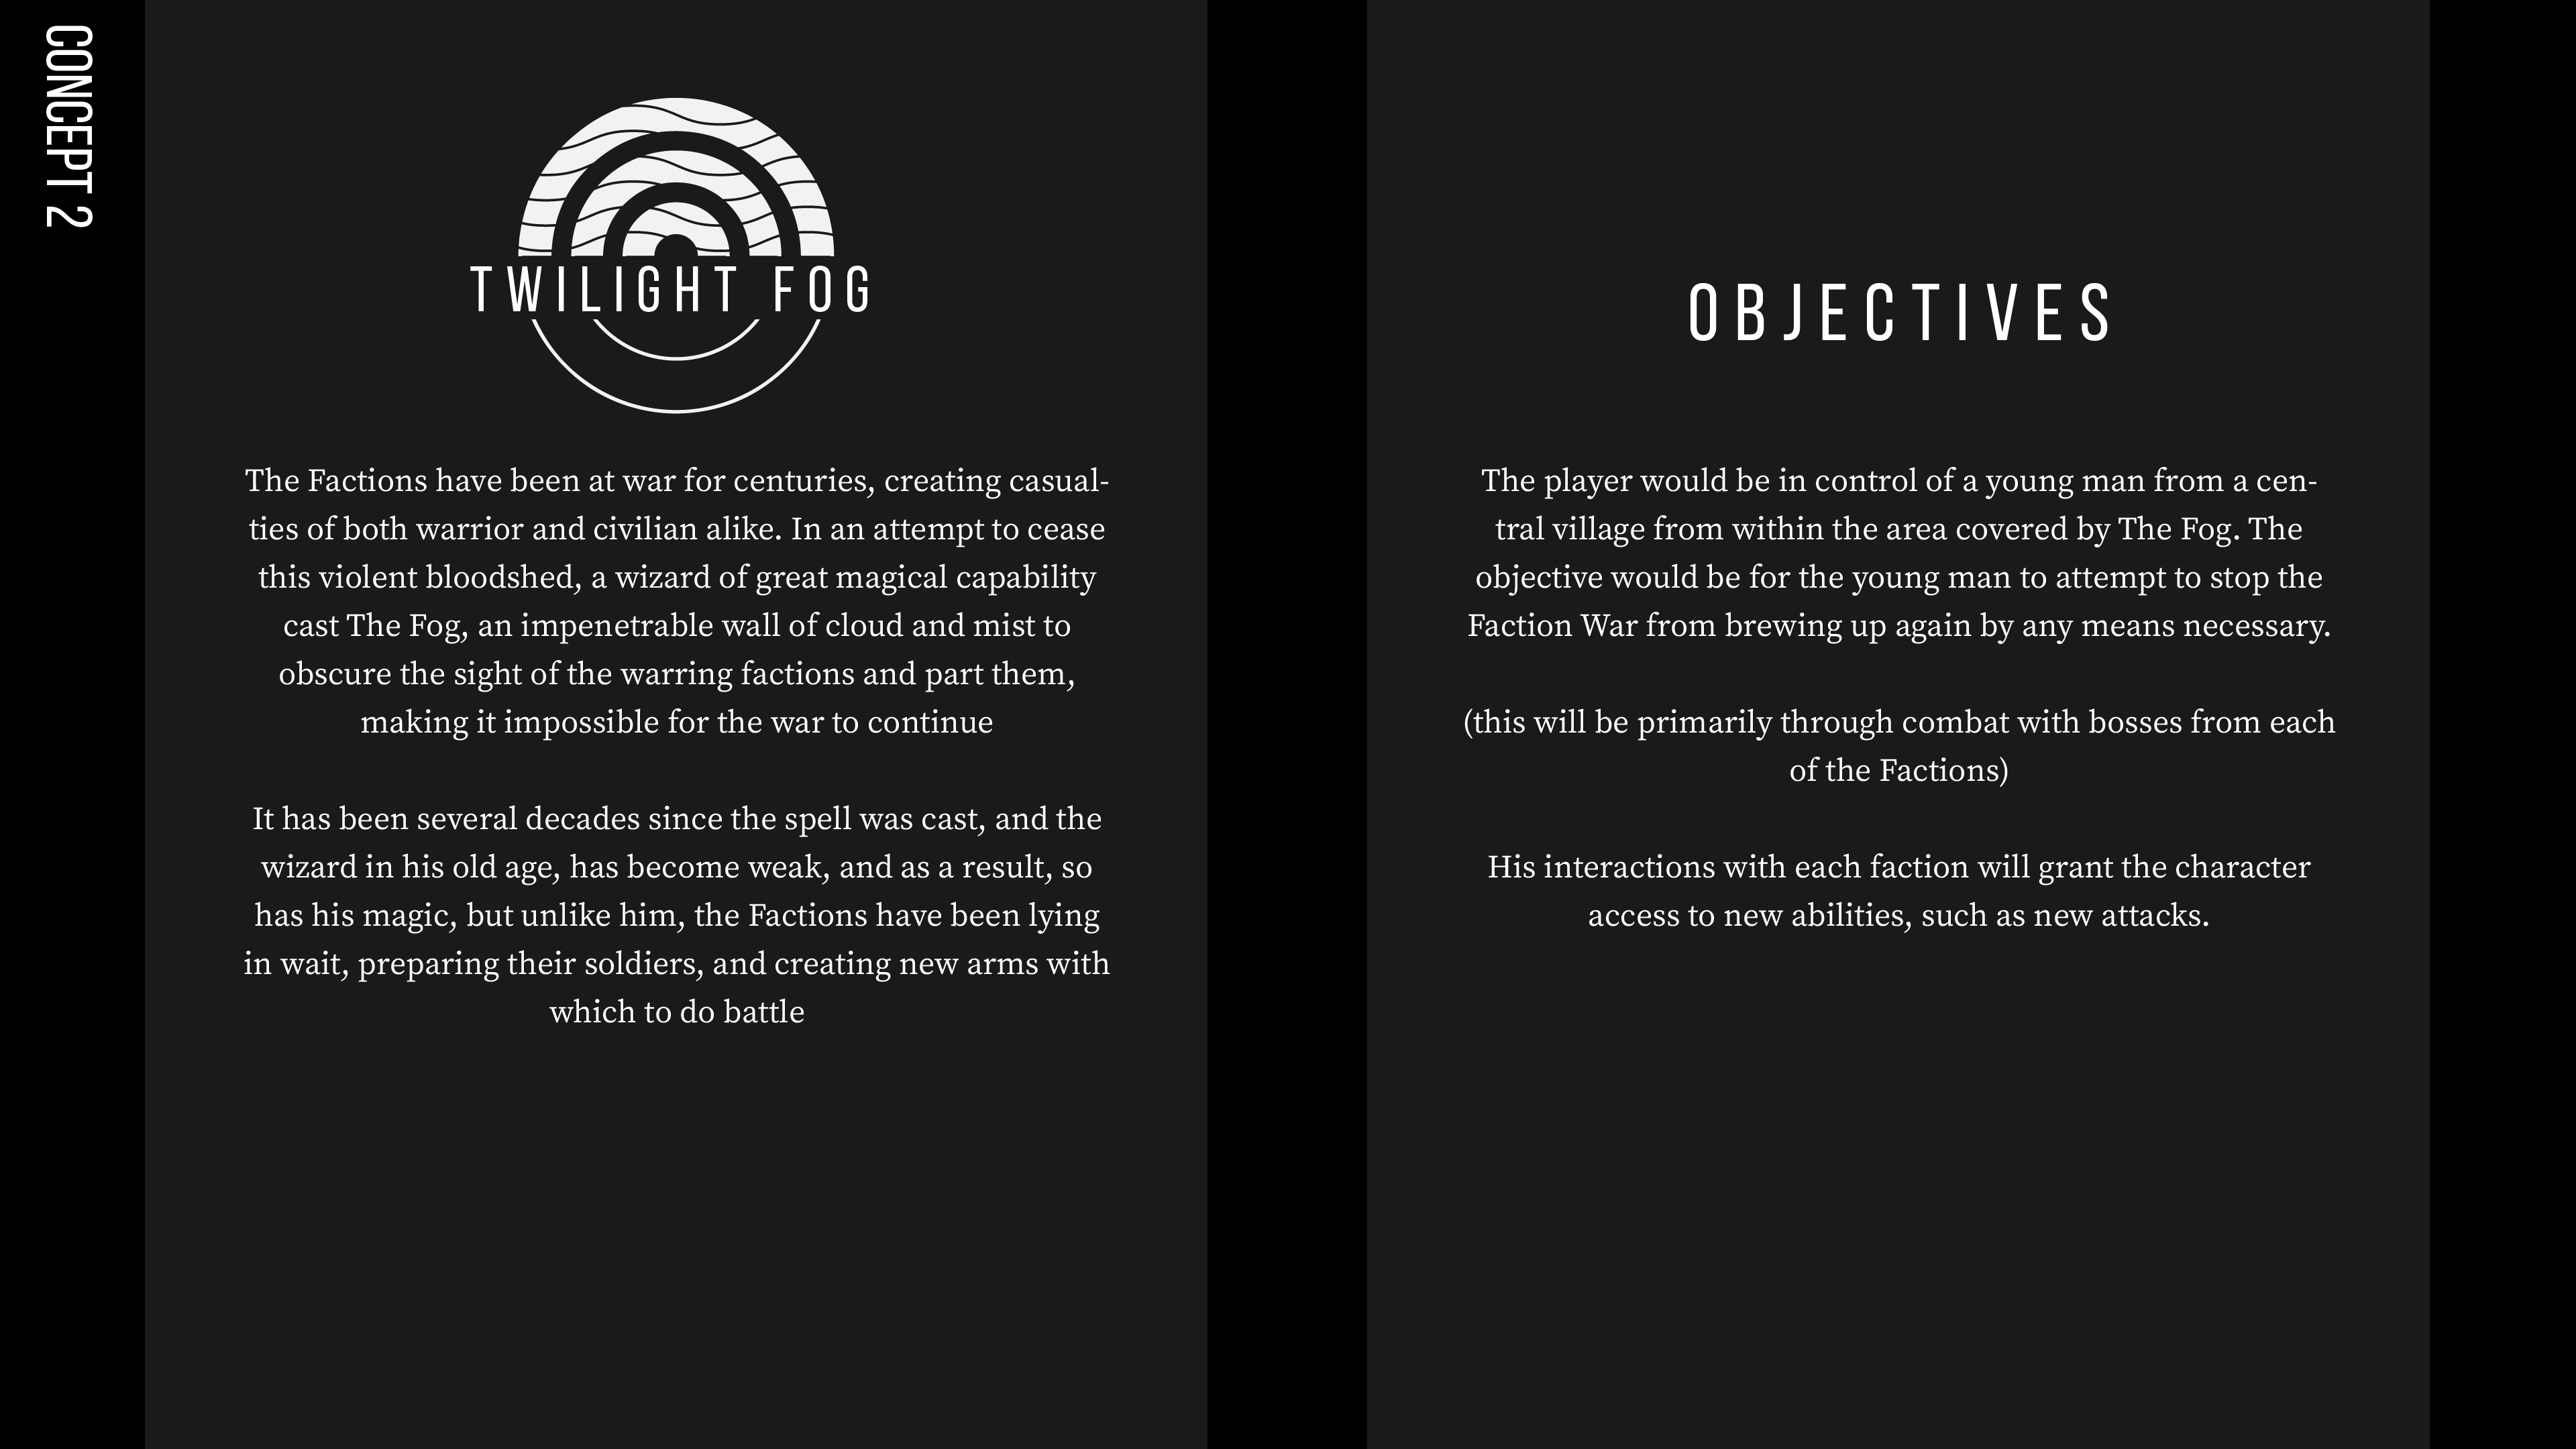
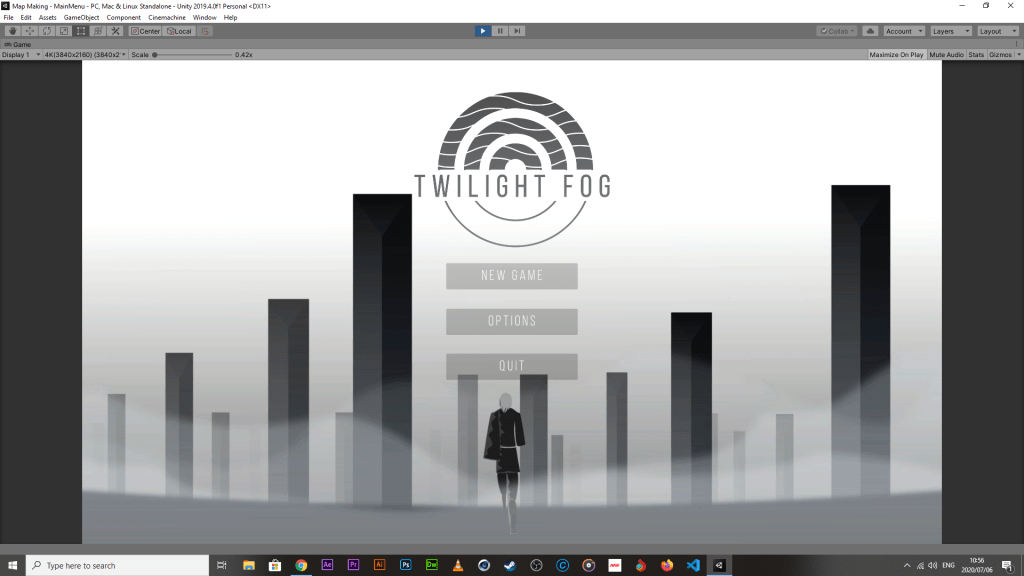
Its been a long time coming, but it had to be this way. We just started this brief, but we have been handing in projects non-stop for VS and BL. Now, this project starts in earnest. I have been busy with two particular concepts.
I managed to get as far as the splash screen for this concept, but then I ran into the issue of having to find a style with which the characters and assets would suit the concept. I am no illustrator, and ultimately, I also have to keep in mind that I need to code the systems of the game in the end, which is all new to me, If I want to make a decent game, I’m gonna have to spend more time learning , I can’t be spending so much time illustrating. From this point, I just moved straight into concept 2, which I think is more plausible of a project given the time-frame we’re given.
24/05/2020
We have gone through the importing and prepping phases for characters, whether they are in a mass component sprite-sheet (so that animations can be built within Unity) or animation sprite sheet (each individual frame needed for a set of animations is rendered upon it, making it easy to quickly set up animation lists). Both have their individual uses, pros + cons (far too many to list), and it all seems to depend on the nature of your workflow and how comfortable you are with the process. After which, we were tasked with finding out what a Skybox is and experimenting further with the resources given to us for the purpose of making the importing and utilisation of visual assets second-nature.
According to Unity’s support docs, A Skybox is a 6-sided cube that is drawn behind all graphics in the game. It is done for the purpose is exuding a presence behind the playable 3D space of the game, for the purpose of creating a more visually massive space, giving it an illusion of completeness. This is also to bypass the limitations of adding more geometry that has to be rendered for the same effect (this is done to reduce the load the computer has carry when rendering the game space, which can be quite taxing). Based on some of the tutorials I’ve watched, my intuition tells me that a skybox is essentially a wrap (can be static or dynamic, like a picture or something that changes when a certain condition is met) that exists around a 3D space, giving the game world its general primary illumination, reflectivity, shadows and tint properties. Every object that exists within a 3D game world takes to some degree, the visual properties dictated by the Skybox.
Now, there are several ways in which to make a skybox, this tutorial outlines the process pretty well.
So I followed his steps and made a pretty rudimentary skybox tileset (6-sided, it will make sense in a minute).
The skybox consists of the cardinal directions, front (+z), back (-z), left (-x), right (+x), up (+y), and down (-y). Each panel you see there (2048 X 2048px) represent those directions and each panel is exported as such. Then, they are put into the asset folder within the Unity file, a new material is made, its property is changed to skybox (6-sided), and selected as the skybox basis for the camera.
This is but one way to make a skybox, and they can always be made far more advanced, but we are making a 2D game, so a skybox isn’t necessarily a critical component, the reason being that we are making background elements that obstruct the z-space perceivable by the camera behind the character and the world it inhabits, Thomas Brush, who is an experienced game-dev and youtuber, explains how he handles the creation of 2D games and how he optimises his workflow for 2D game development, the video below is worth a look.
25/05/2020
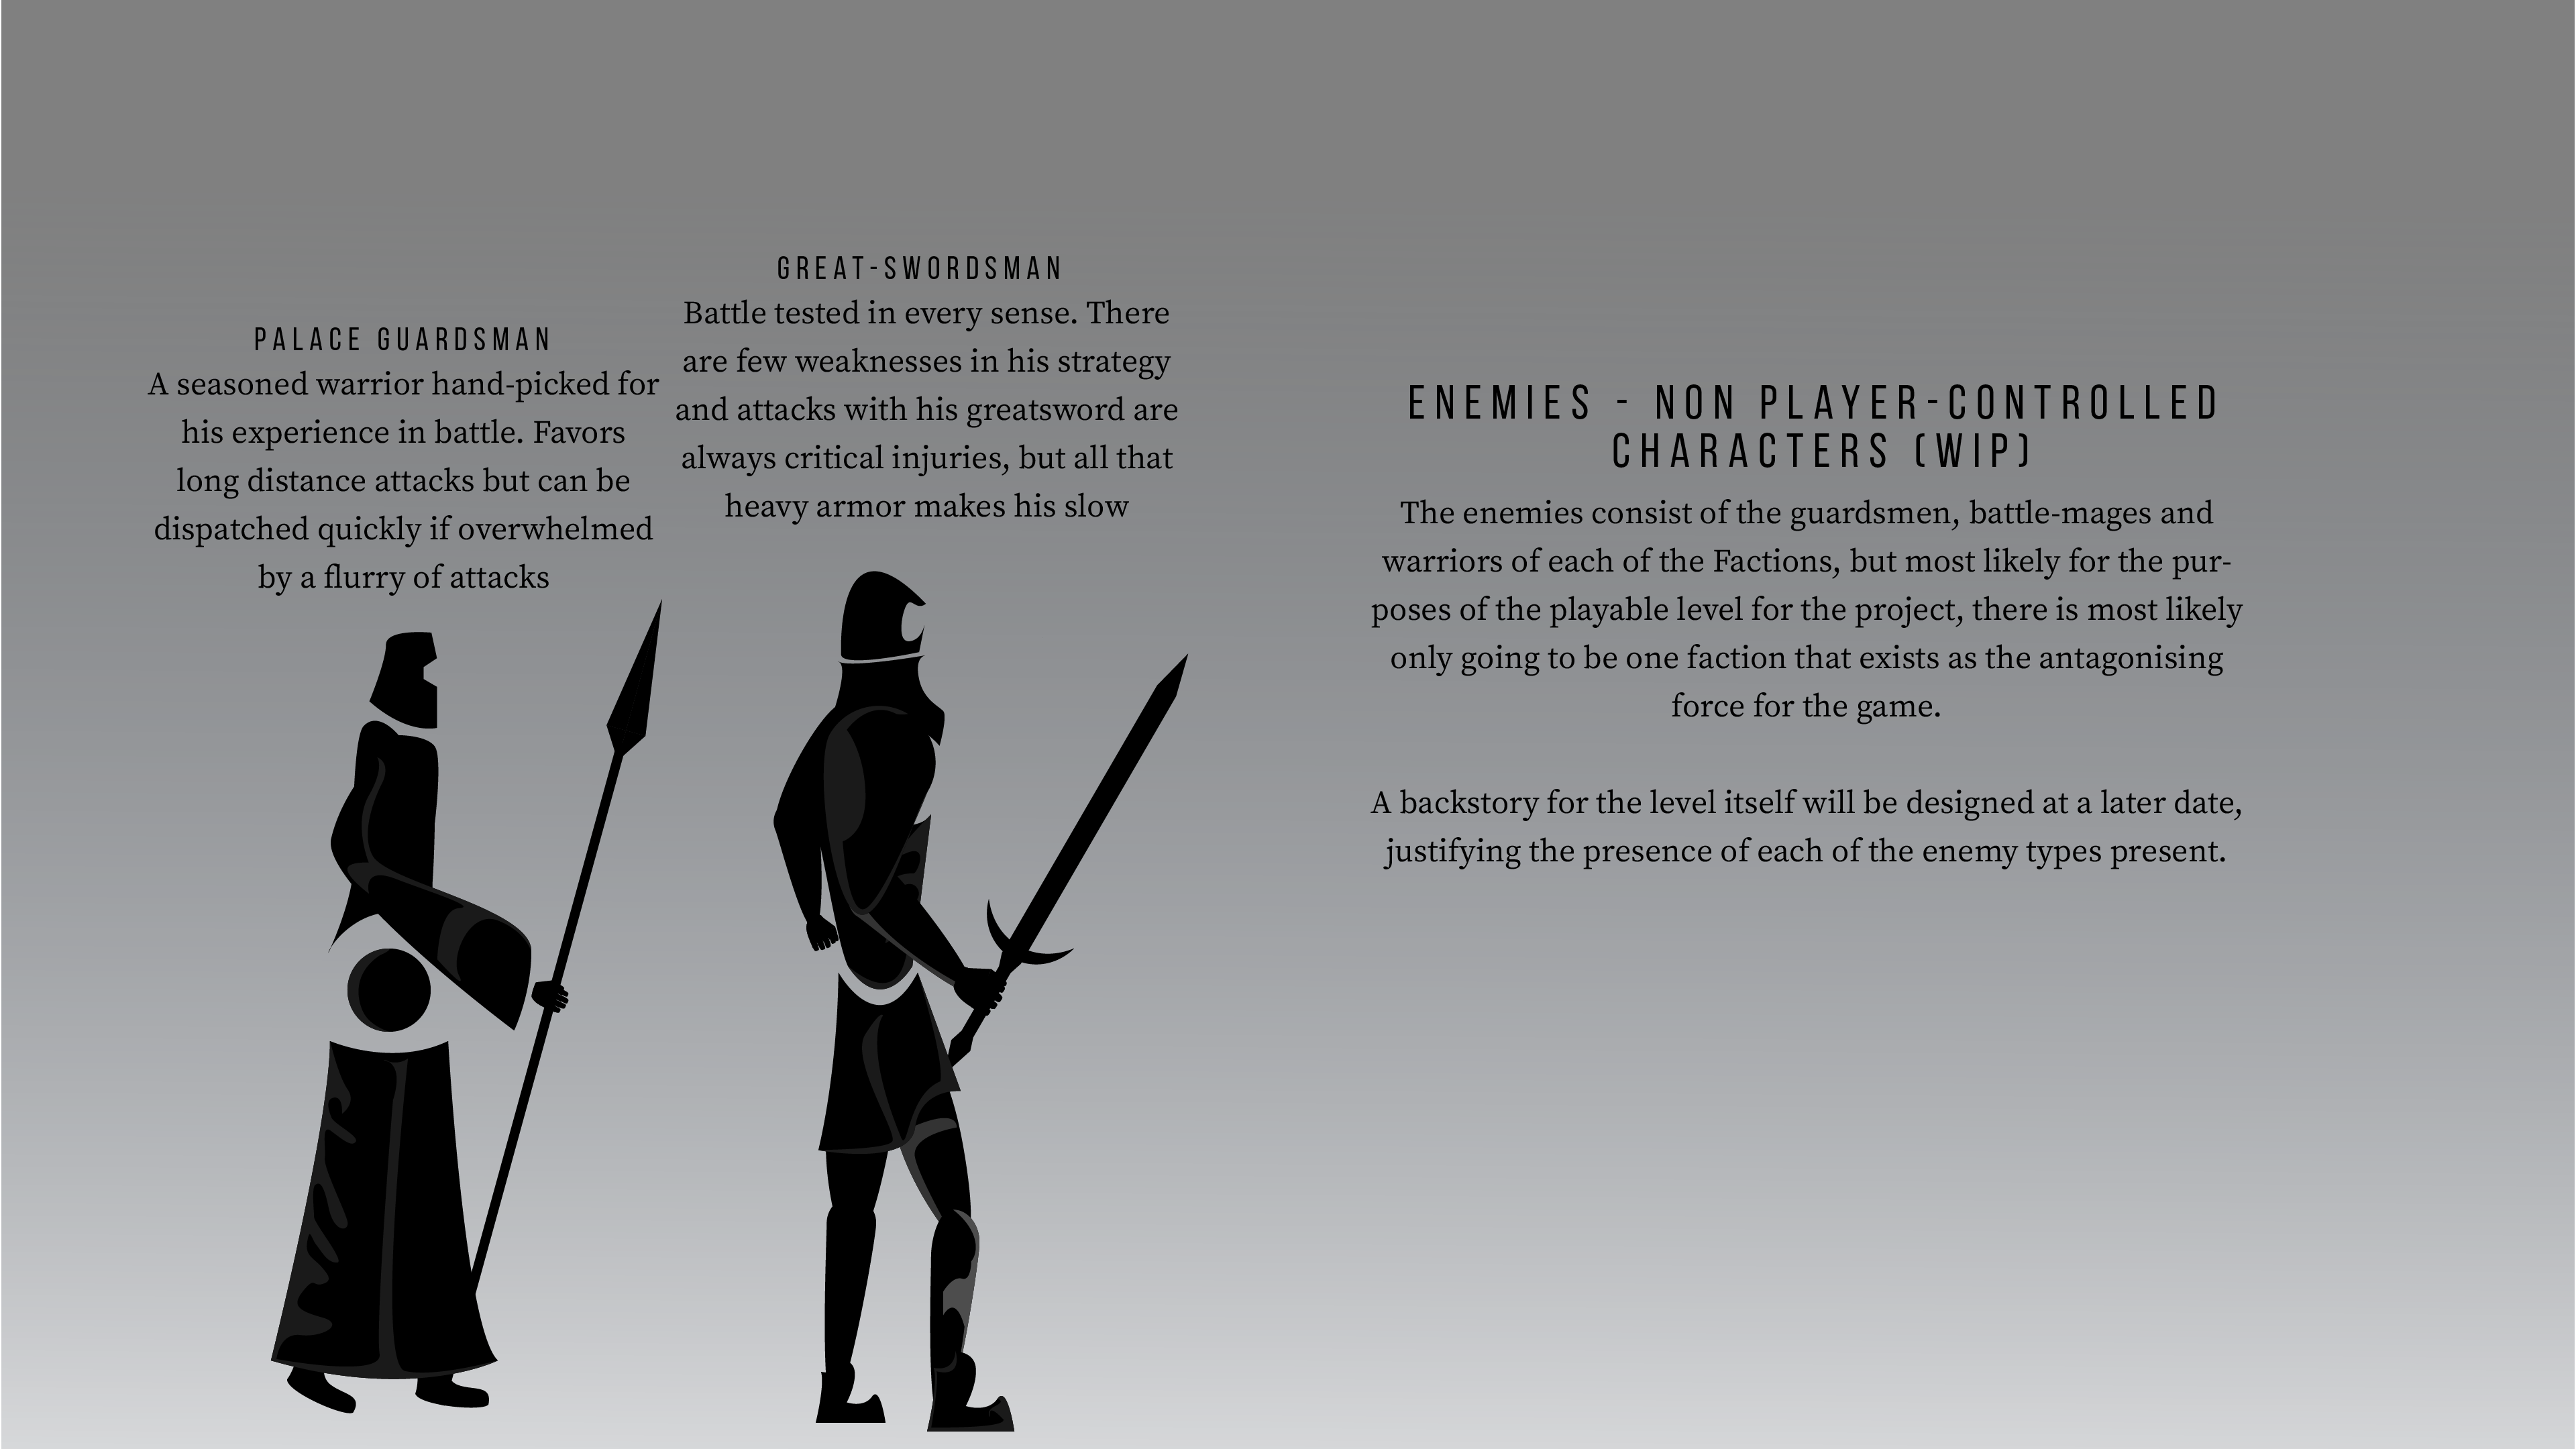
I have finally managed to get through all of David Kegg’s material on the basics of character conceptualisation, and it has been a really informative experience, and managed to get a few useful tips, especially with regards to shape psychology, which is something I didn’t know existed. To put it plainly, shapes denote certain qualities in reference to the whole composite made of those shapes. There exists 3 distinct types:
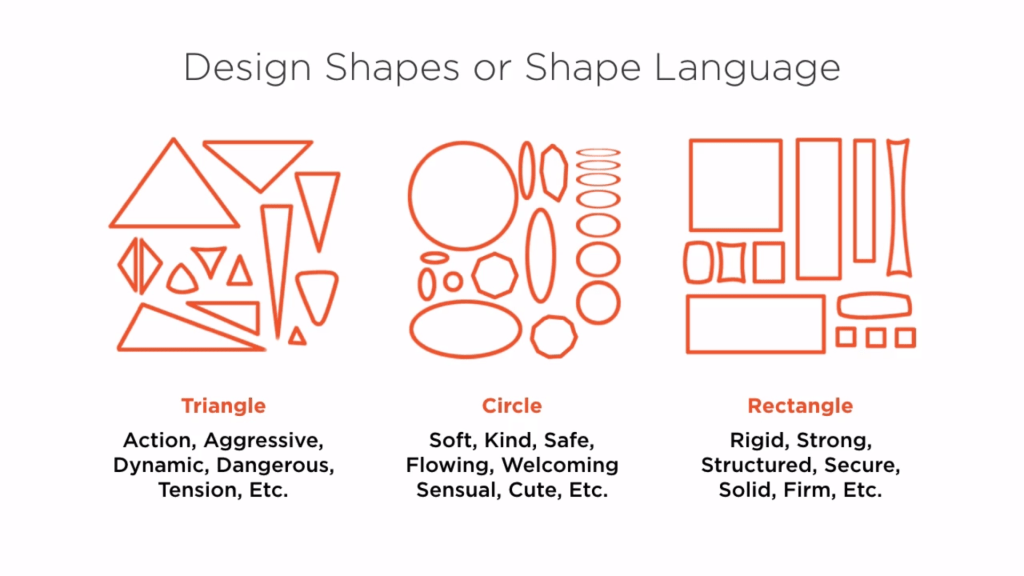
The ratio dictates the percentile of the qualities exuded by the shapes, for instance, a character consisting of triangles exudes a presence of dynamism and aggression, of extreme energy potential (take for instance, a warrior in spiked armor or the T-1000 from Terminator 2), circles are passive shapes and thus exude a softness and assumed kind-hearted nature (think Kirby or Jigglypuff from Pokemon), and rectangles are primarily ridged structures denoting a degree of fortitude and toughness (the ridges on a traditional chest plate display this quality.) Of course, it isn’t set in stone, and generally, there can be conflicts in a characters nature compared to their form for the purpose of displaying a multi-faceted nature, but more often then not, characters tend to act as their form displays.
On to the function of Silhouettes
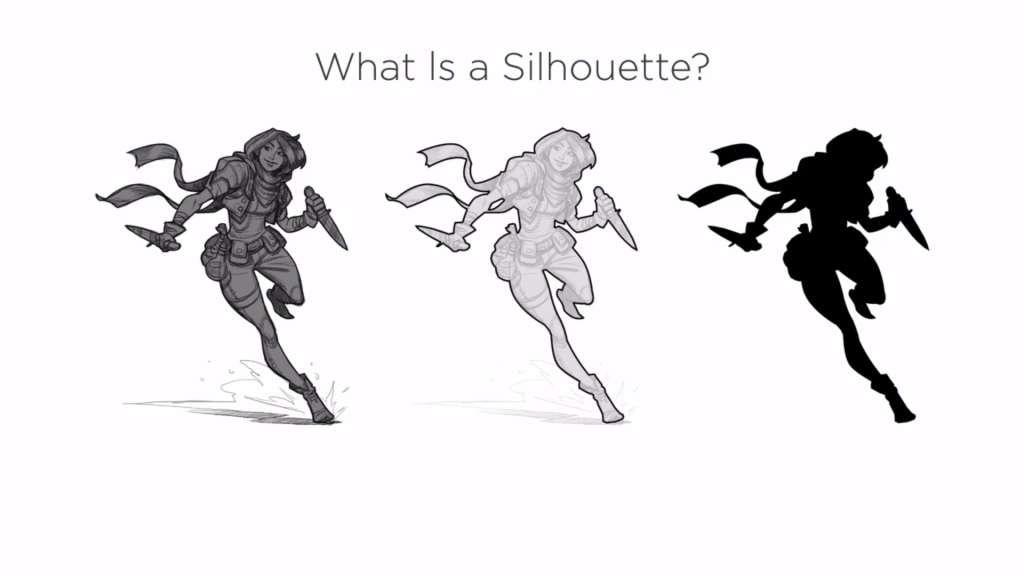
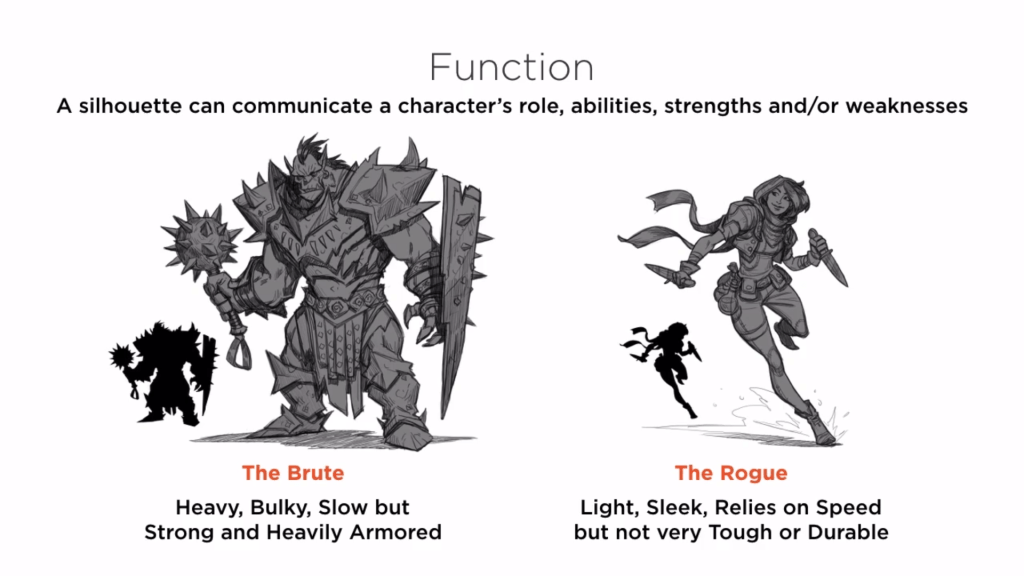
As stated above, the silhouette speaks of the potential role or function of a character and what traits they rely on. Again, there is the potential for characters to exude abilities and qualities outside of their form (which is often done to shake people out of pre-conceived notions of “what you see is what you get.” It can also be worked into game systems where the premise allows for breaks in traditional senses of physics, like magic systems), but the norm is for the function to meet the form.
Now onto reference sheets. David Kegg suggests that for the best possible outcome, the backstory comes first in the form of parameters, allowing the character to be built around it, which allows for the concept designer to look at potential references first.
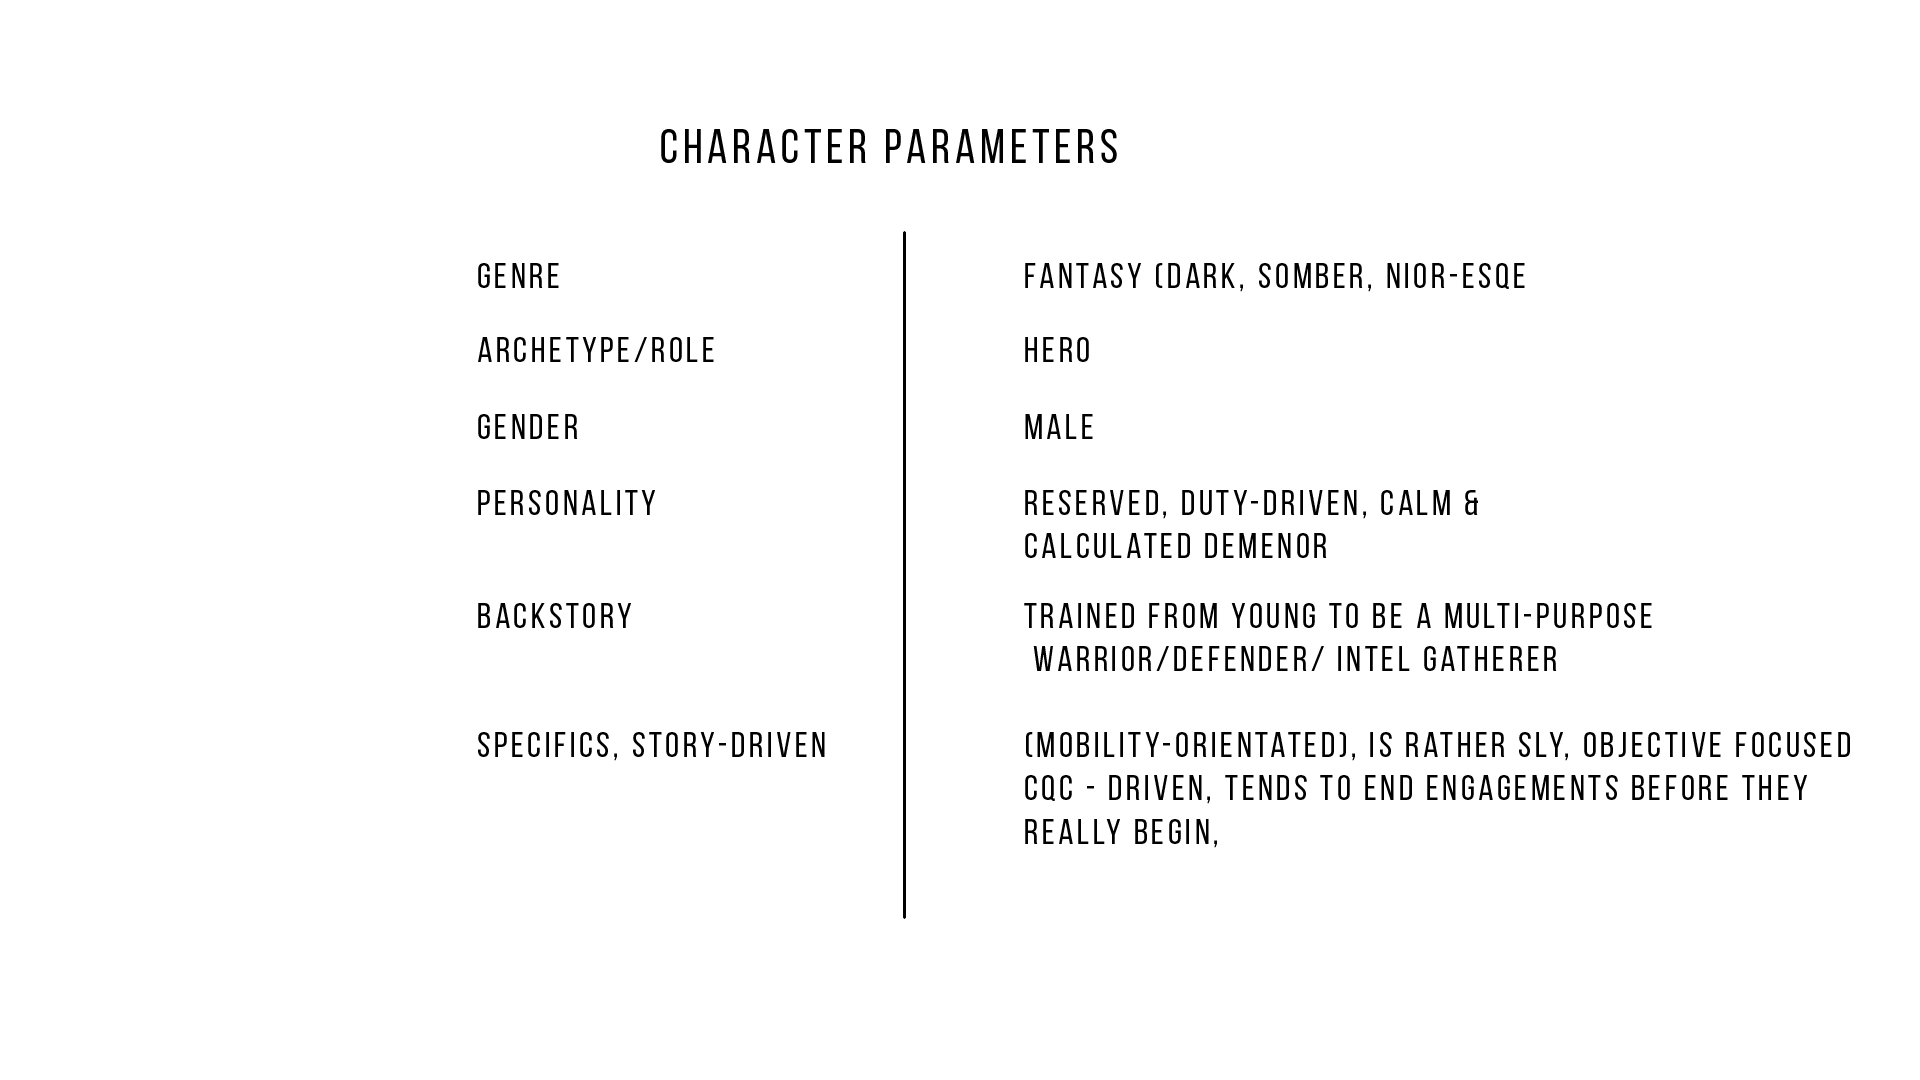
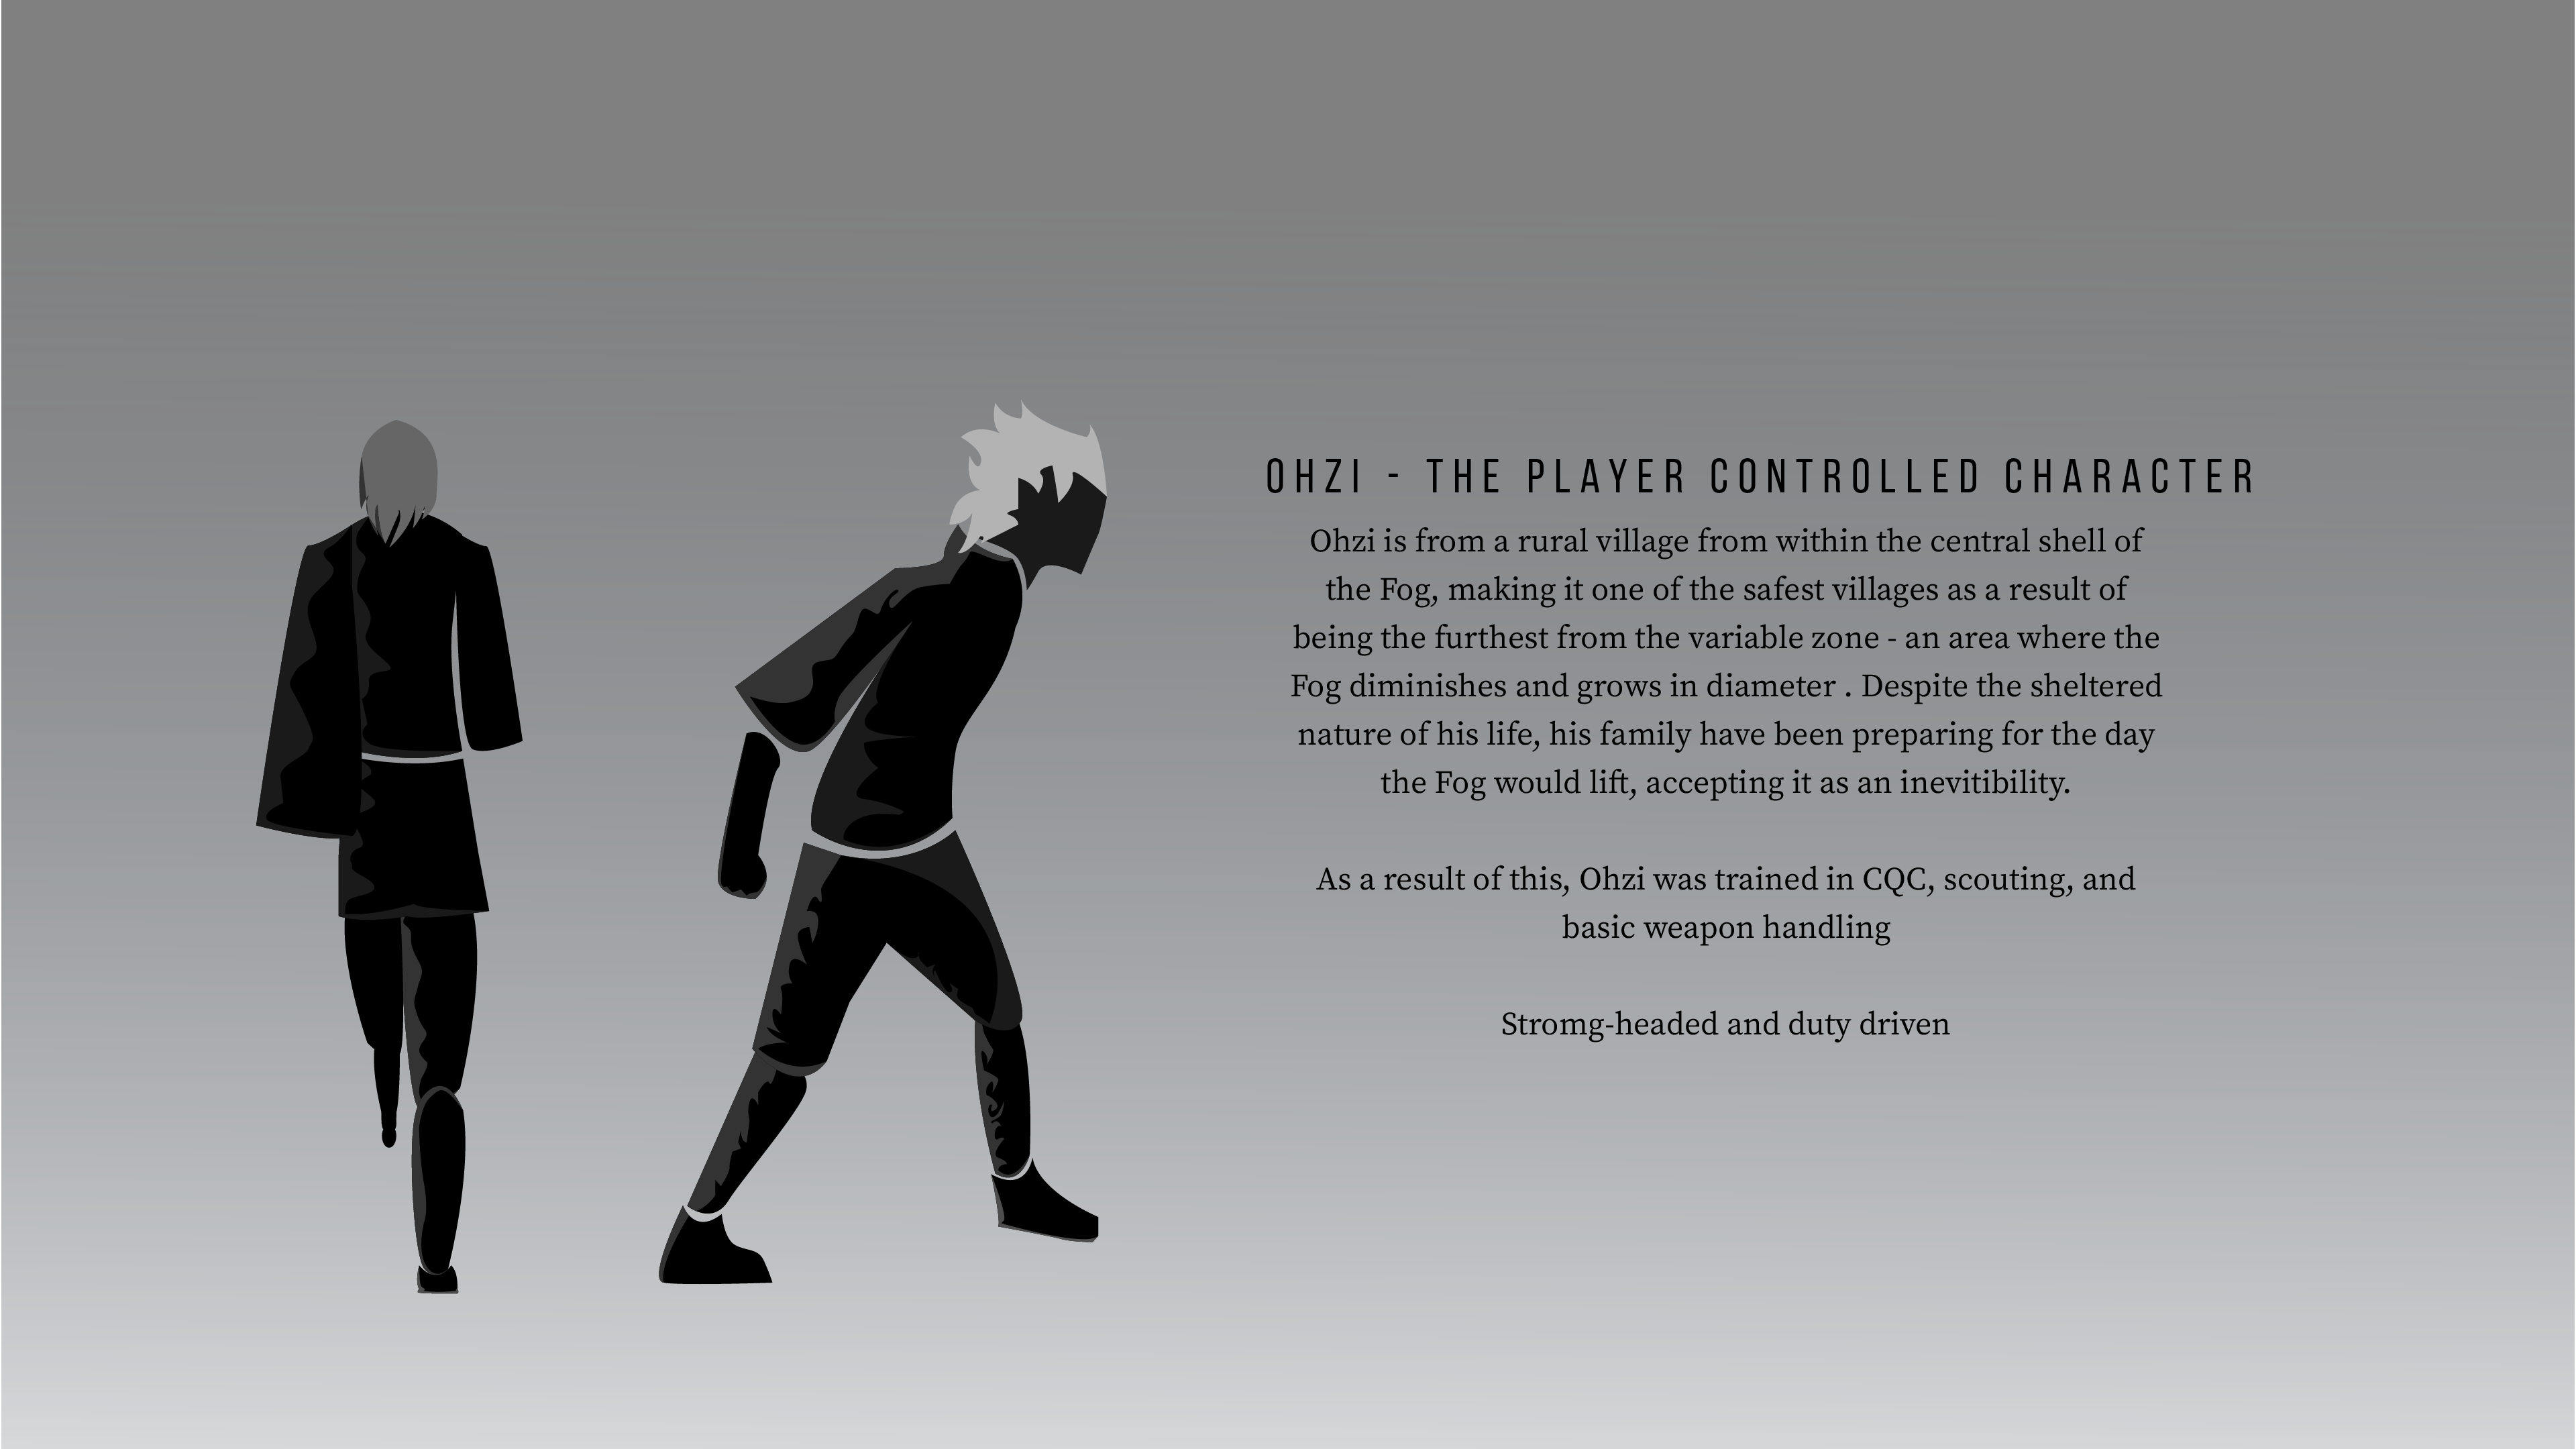
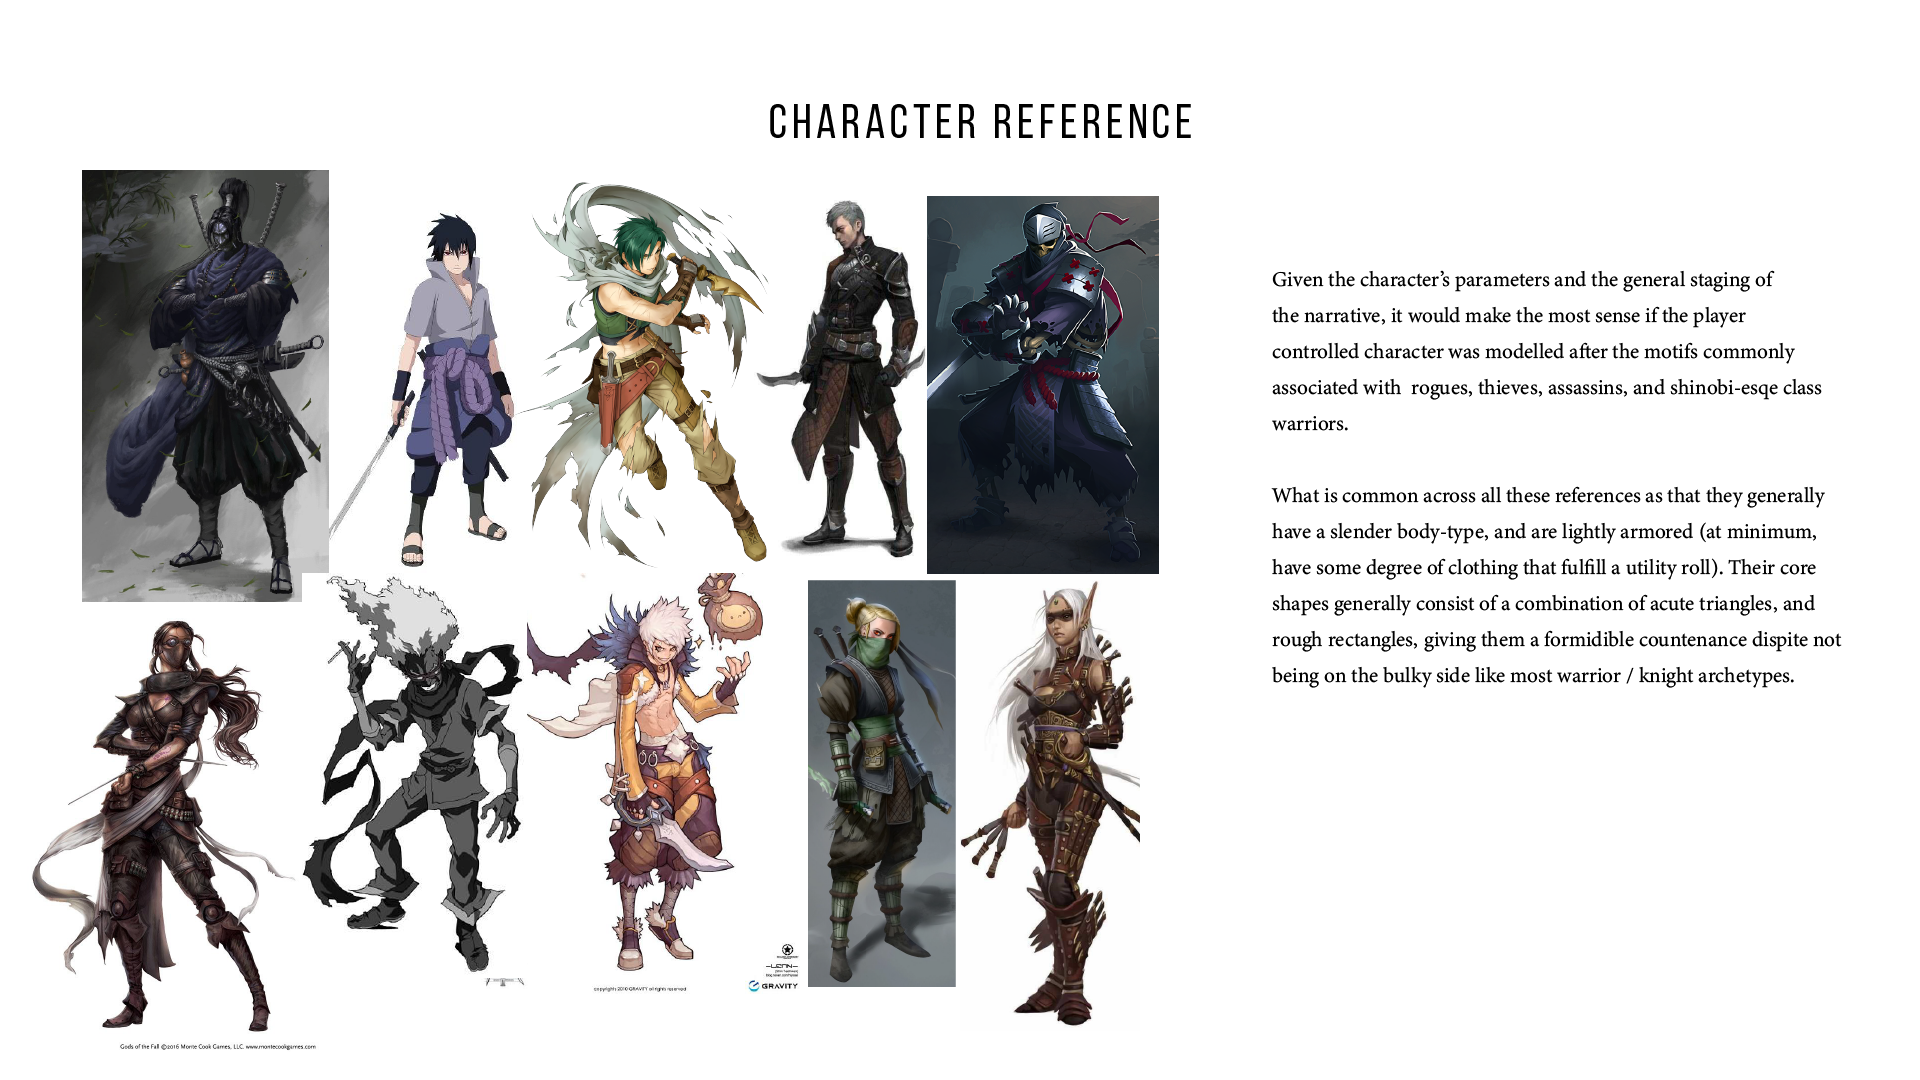
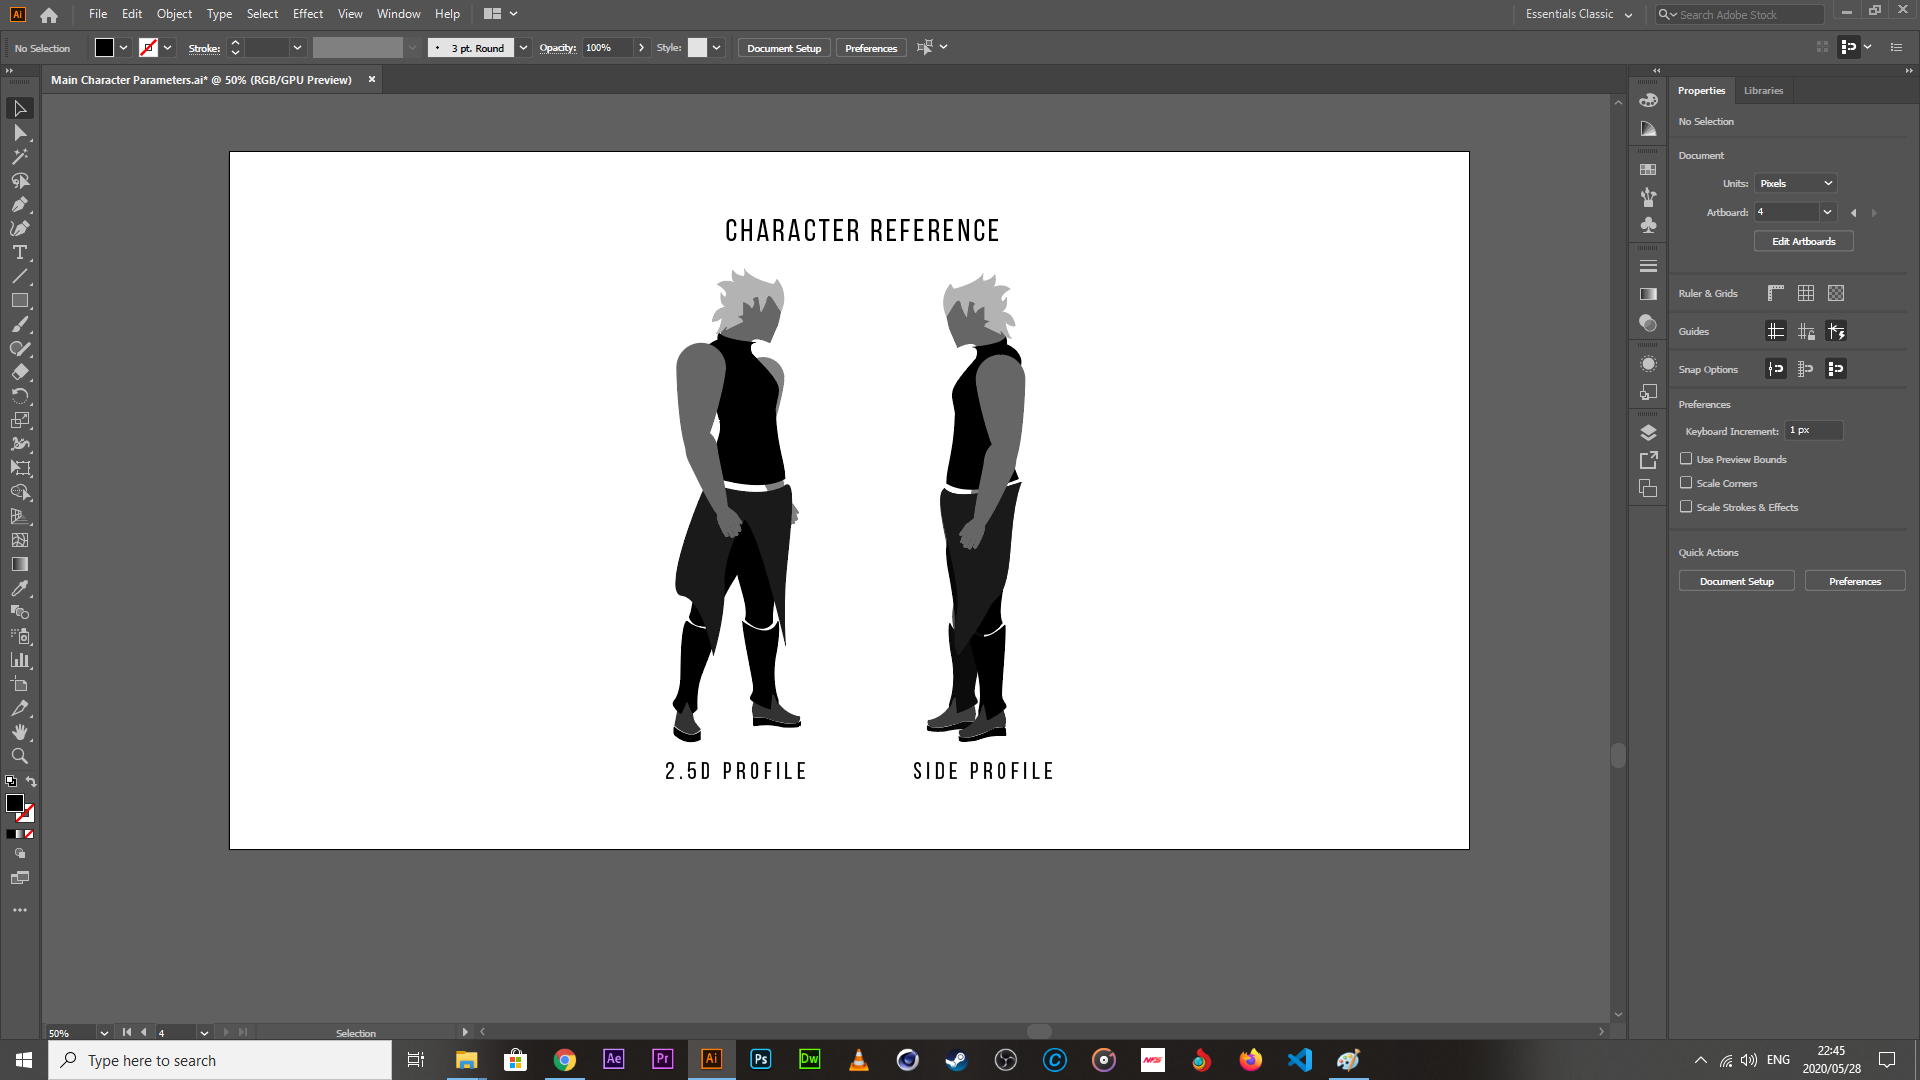
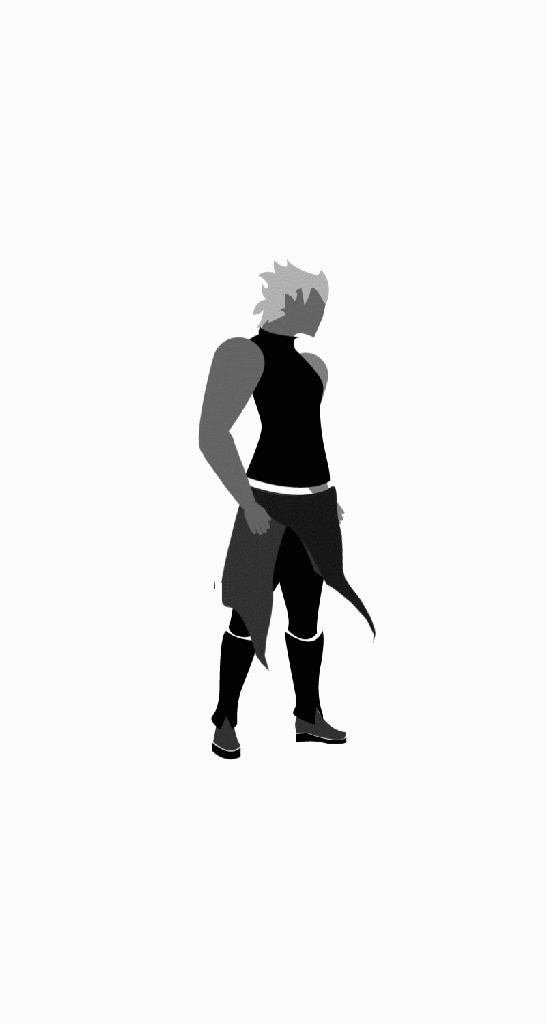
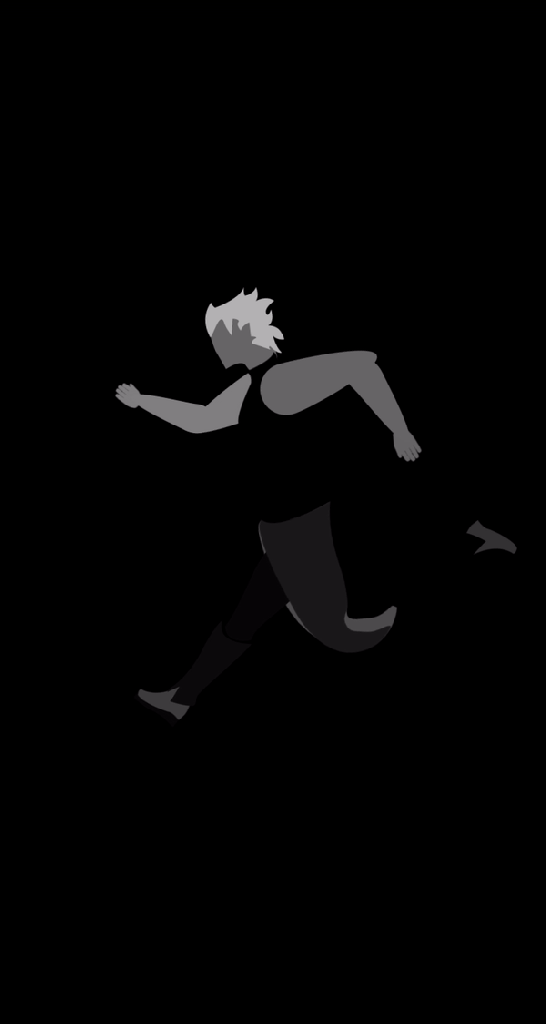
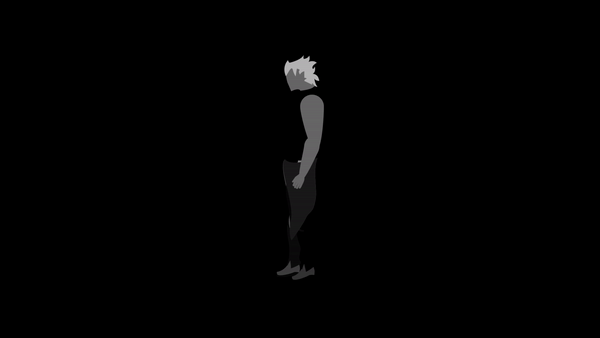
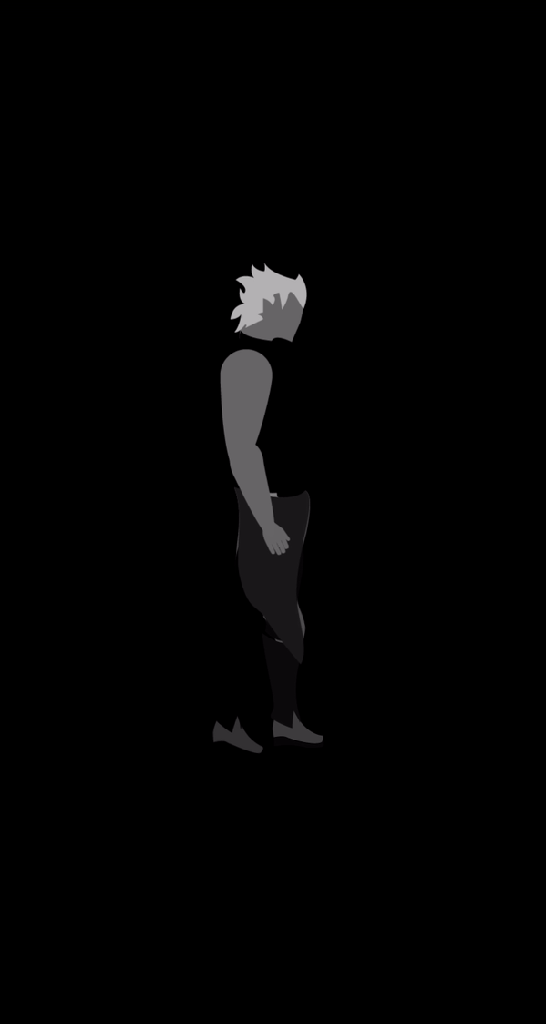
My parameters were somewhat already set by the first time I attempted to make a character. I then moved to an actual reference sheet, selecting images based on my idea of what kind of warrior type would best suit the narrative of the player-controlled character. We already know that the character is of a relatively young age, is cqc orientated with scout and intelligence gathering training, to be effective at those roles, he would have to be fast, both in a distance-covering sense, in a situational awareness sense, and a combat-orientated sense.
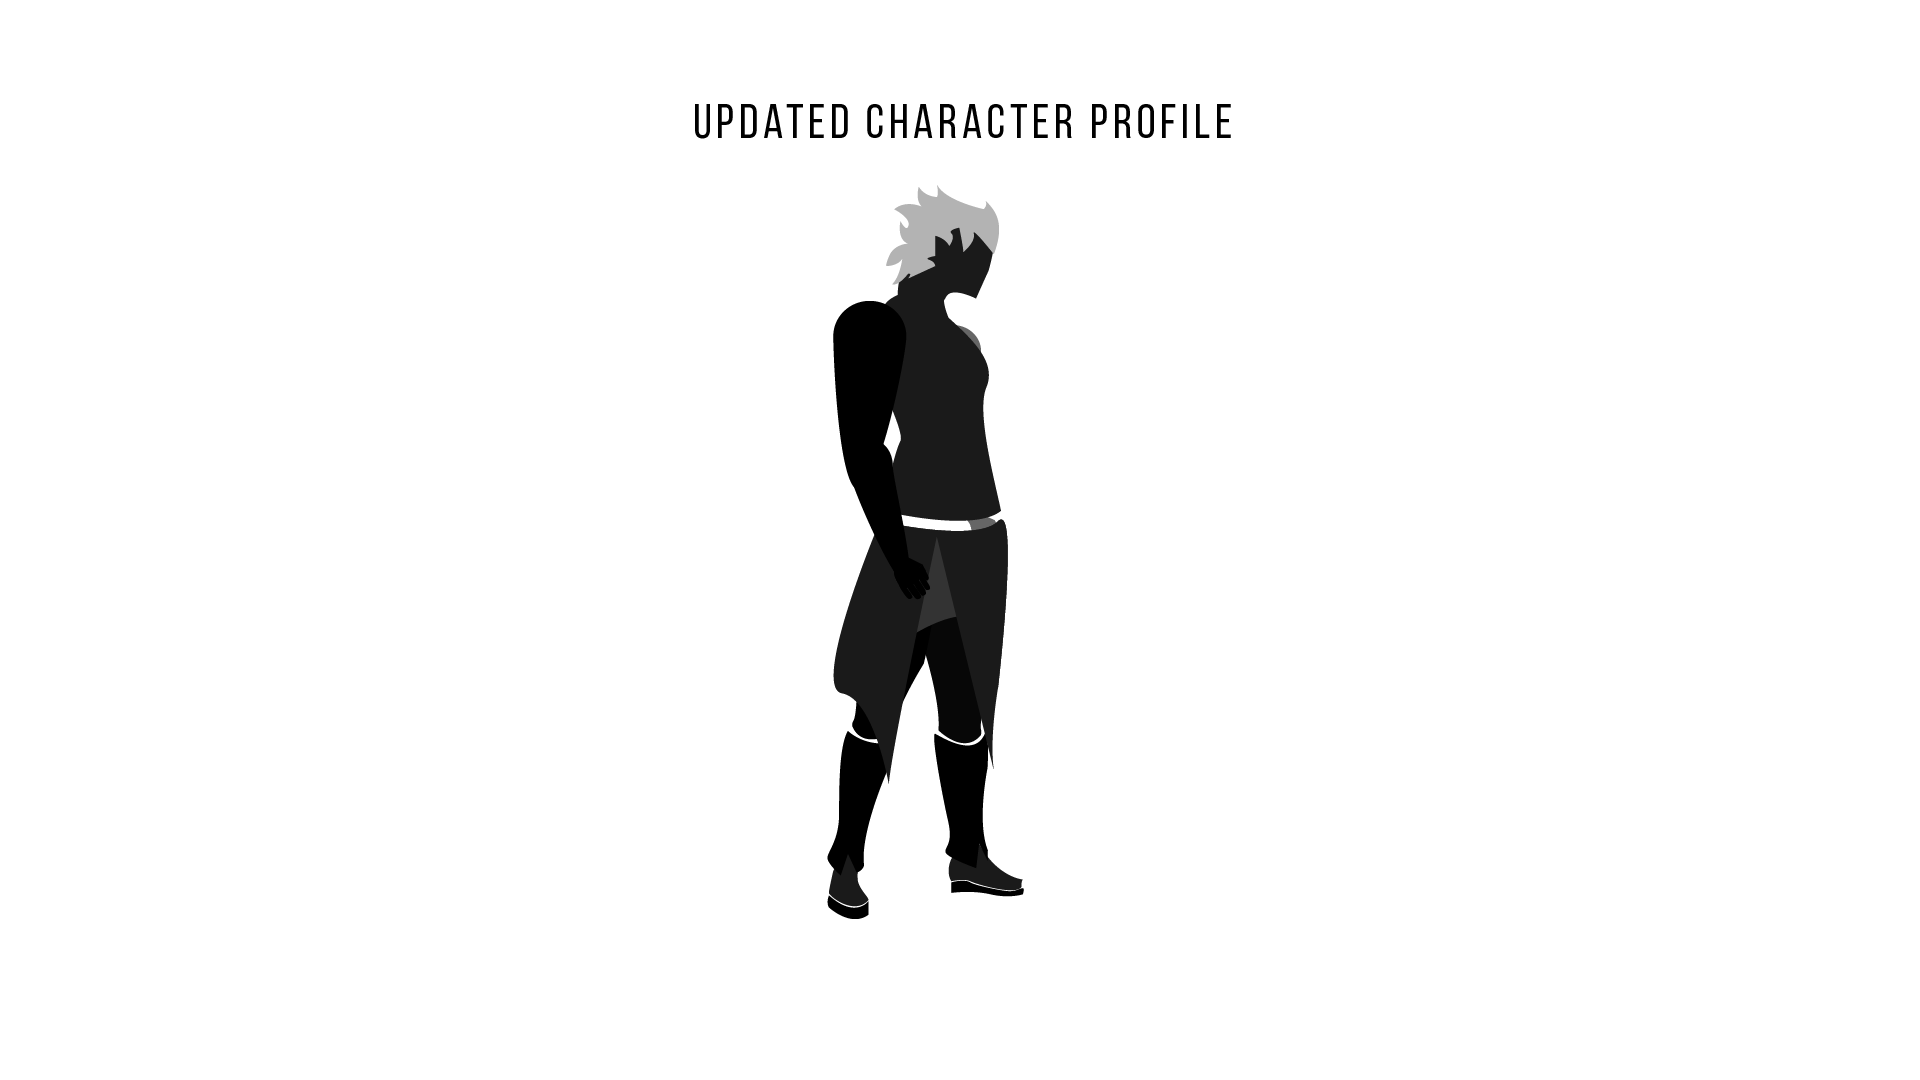
Now, with these things in mind, we can create a profile on which to build (this is moving into the silhouette stage, but it is important to note that I intend on keeping all characters in a silhouette form). I think this is a step in the right direction. Following on with David Kegg’s tutorial, he goes on to talk about lighting and color. Strictly speaking, all characters in this world will be shades of black and grey due to the overall exposure to dull light as a result of the Fog.
In terms of lighting, this is going to be a bit of a challenge. In a 2D sense, lighting doesn’t strictly happen as it does in a 3D game (you remember the skybox and the properties it controls, 2D games generally don’t have one). In other words, a particular lighting style is going to have to be baked onto the character, but I can’t paint it onto each body part as it is, otherwise it will just look as though its tattoo’ed onto the body of the character. I spoke to Catherine to see how she handled this aspect, she suggested that I create the character in its basic form, rig and animate in Ae, then export to as a sequence, and then paint each frame to simulate light reacting to the form of the character. If the time allows for it, I will attempt it, otherwise, I am just going to have to added the details without highlights and core shadows.
28/05/2020
So, its been a pretty long couple of days and we have been super busy, we were tasked with getting our main characters into a game file for testing on a Mario backdrop. To do this, a few things needed to be decided on. Firstly, how do we want to animate our main characters? Before we can consider animations, we need to talk about rigs and the various rigging processes
There are a couple of ways
- Unity has an in-built rig system in place for building animations for characters. The way it works is that a character is first separated into its component parts in illustrator or photoshop, then exported as a png. The png is then imported into Unity, sliced back out into its component parts (this is done so that Unity recognises new boundaries of each part) and then a structural rig is then bound onto each of the components and then re-built together. This has a couple of pros, the animating process is relatively simple, speed controls for animations are simple, quick, and you don’t need to leave Unity to do it. The cons are that it is pretty limited to whats on the png after the rigging process is done.
- Each frame can be hand painted and exported to a sprite-sheet, bypassing the need for a rig. The pros are that its the best way to do a style that is really unique and you can illustrate a 3D profile (you aren’t limited to a 2D or 2.5D profile that rigging systems impose, unless you work with a 3D rigging system like Mixamo or software with built-in 3D rigging functions like Blender), the con is that painting each frame is time consuming, editing after the fact is quite limited, and unless you have access to an animating guide for each of the possible states (roughly specific to your characters body-type) or are experienced in animating anatomically-sound bodies, achieving a look that is unique but also coherent in movement for the character, is beyond challenging, so much so that there are courses within a degree dedicated just to that.
- You can rig your character in 3rd Party software, After Effects with the Duik extension is a great example for 2D and 2.5D stuff and the one I am most familiar with. The character is brought into After Effects, pre-organised according to its component parts, linked to its corresponding representing body part on the rig. Once its done, it gets IK-bound to the rig, creating controllers for each body part. The pros are that its relatively simple step-wise to set up and can come with bonus features to clean the rig post attachment, as well as combine 3rd party software effects, scripts, and expressions to the character at any point in the animation process. The cons are that it is relatively easy to mess up the attachment process, creating a smooth rig takes a bit of modification of the rig system, which is both time-consuming and not very friendly to beginners, you are pretty much stuck in the profile you created the character in originally, provided you aren’t prepared to create more rigs with different profiles, and although it isn’t such a requirement to have an animation guide (due to the fact that the rig prohibits the breaking of a skeletons natural range of motion attached to the character), it is always best to reference one, but this is also adding to the time-consuming nature of this process.
While there are other methods, I don’t know them well enough to discuss them or even consider them as options, but one thing I haven’t discussed yet is combinations. I don’t know if its possible to start in Unity, export the animation, and modify it elsewhere, but that is totally a possibility when it comes to starting in After Effects/Duik. To explain what I am suggesting, I kinda need to explain why I choose to go with After Effects, despite it having the most evident number of down-sides.
Unity attaches animations to bodies in two ways, either through its proprietary rigging system, or through an image sequence, which is what allows people who prefer frame-painting a sequence for each state. After Effects is capable of exporting a sequence of images in png format, but that doesn’t mean it has to stop there. I can take that sequence into another 3rd party software like Photoshop or Animate (what used to be flash), and use the afx-created sequence as a trace for a more stylised final exported sequence. This mitigates some of the limitations like being bound to a particular perspective, while having the bonus of being more stylised in a cell-shaded kinda way. Of course, the added drawback is an essentially doubling the time required to finish the outcome. Doing it this way will be the creme-de-la-creme for me, but I will be conscious of the time constraints and leave the cell-shading as a bonus objective should the time allow for it. For now, its just After Effects/Duik.
So where do I start?
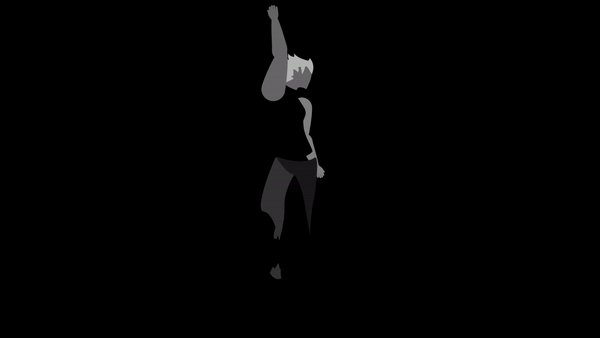
Well, I have one profile which is ideal for an idle, but it isn’t really ideal for running/walking/jumping/lateral movement in general. So my first step was to create that profile. In most 2D platformers, that profile most used for lateral movement is of a characters side, so that is the profile I needed to create.
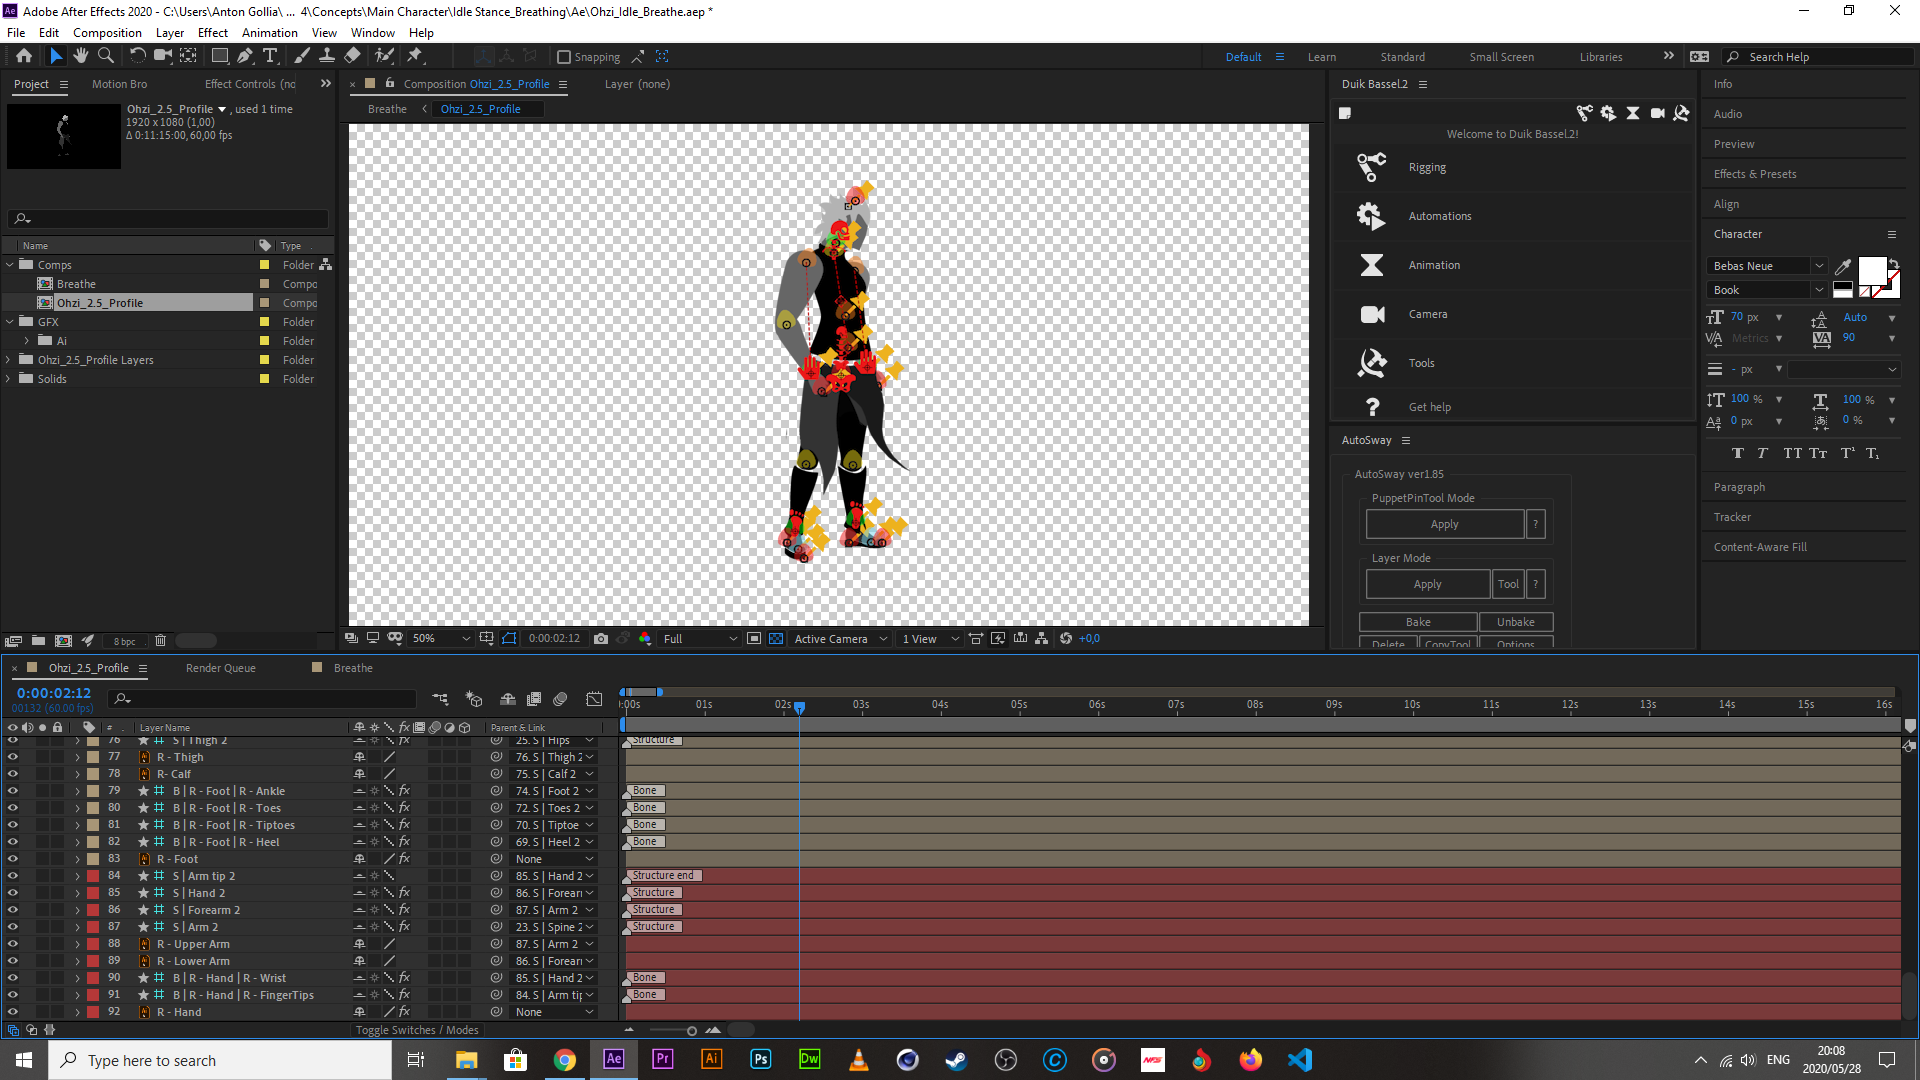
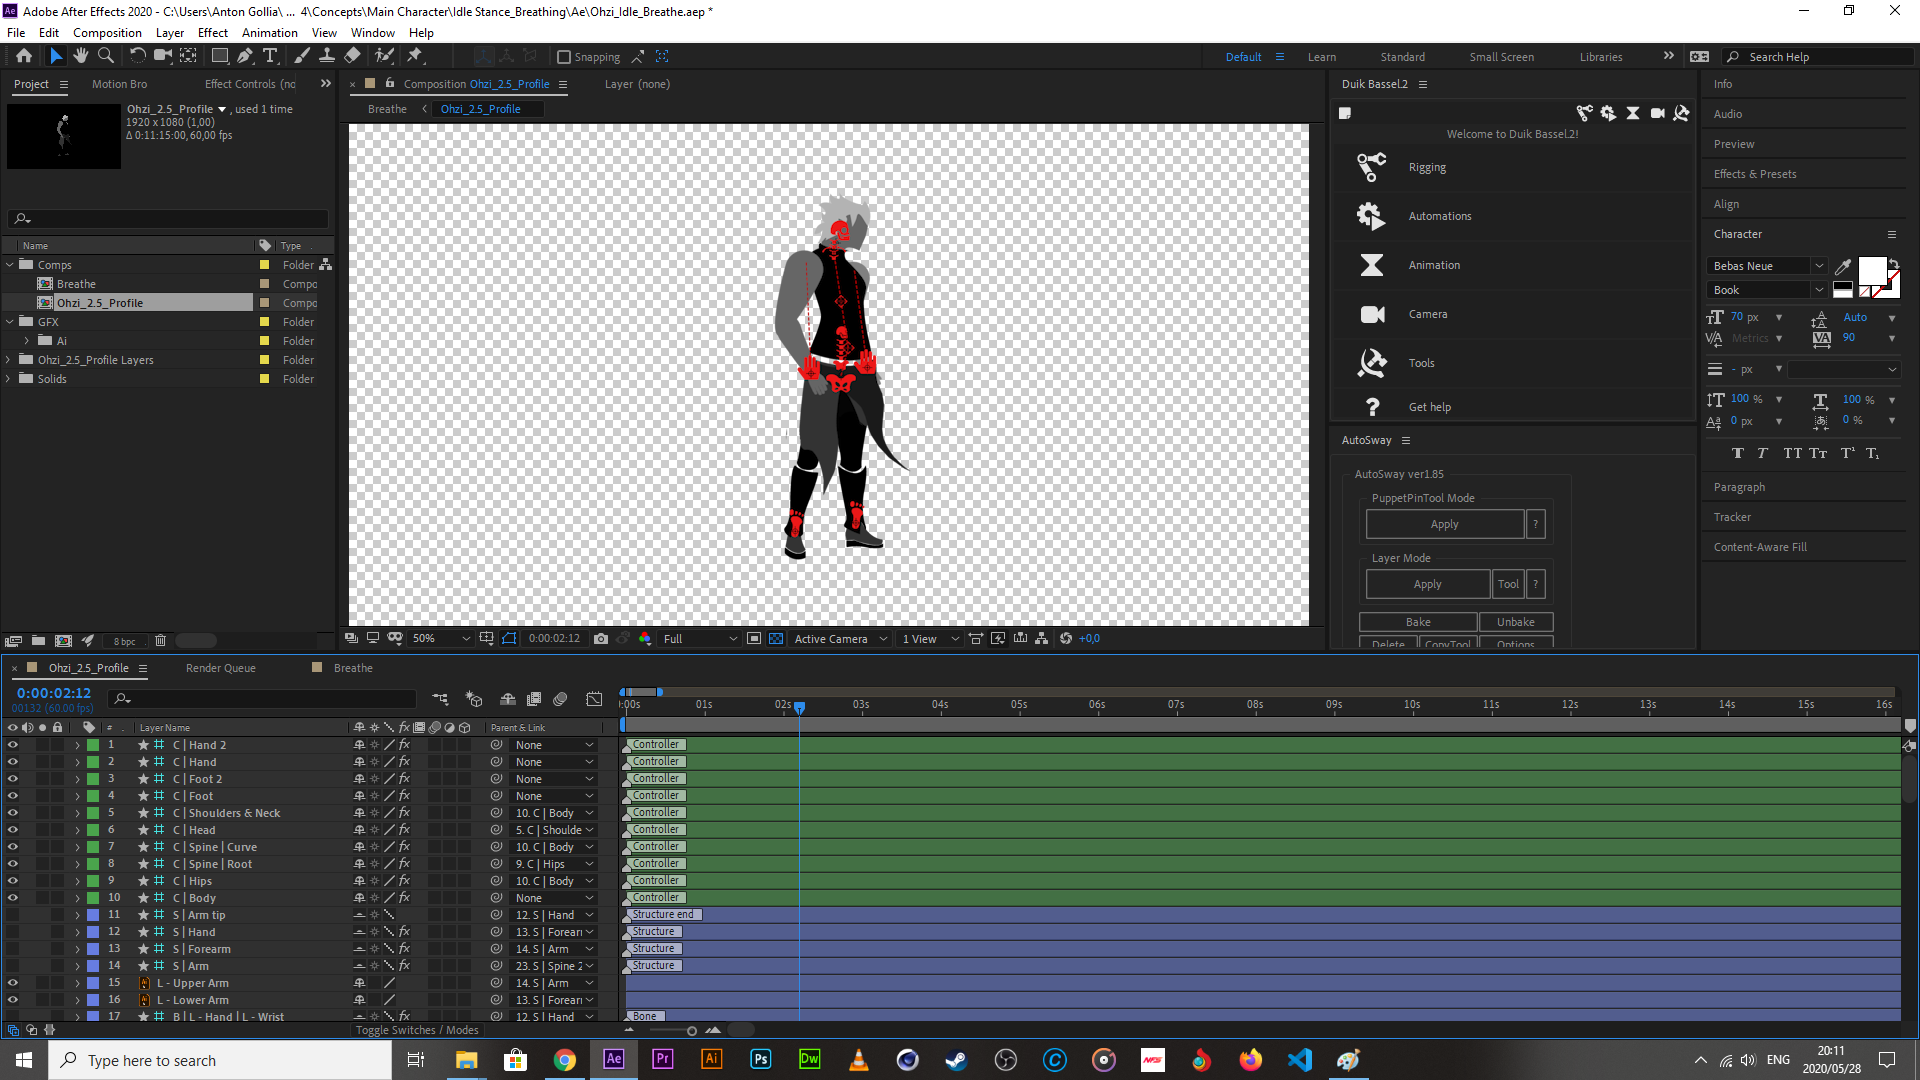
The next logical step was to get the extension Duik, and then rig my character profiles for animation.
Now, the last time I had access to Duik Bassel, it was version 1.4 or so. Since then, version 2 has come out, with news that version 3 is being crowd-funded at this very moment (the goal has already been reached but they just gonna keep going, I would contribute myself if I could, I believe that they totally deserve praise for creating a pro-lvl extension and giving it away for free for the benefit of the animation world). Of course, last year was the last time I used it, so I am a bit rusty. I have revisited old guides for the purpose getting back up to the basics necessary for creating a working rig, all the fancy new features I’ll check out when I got time again.
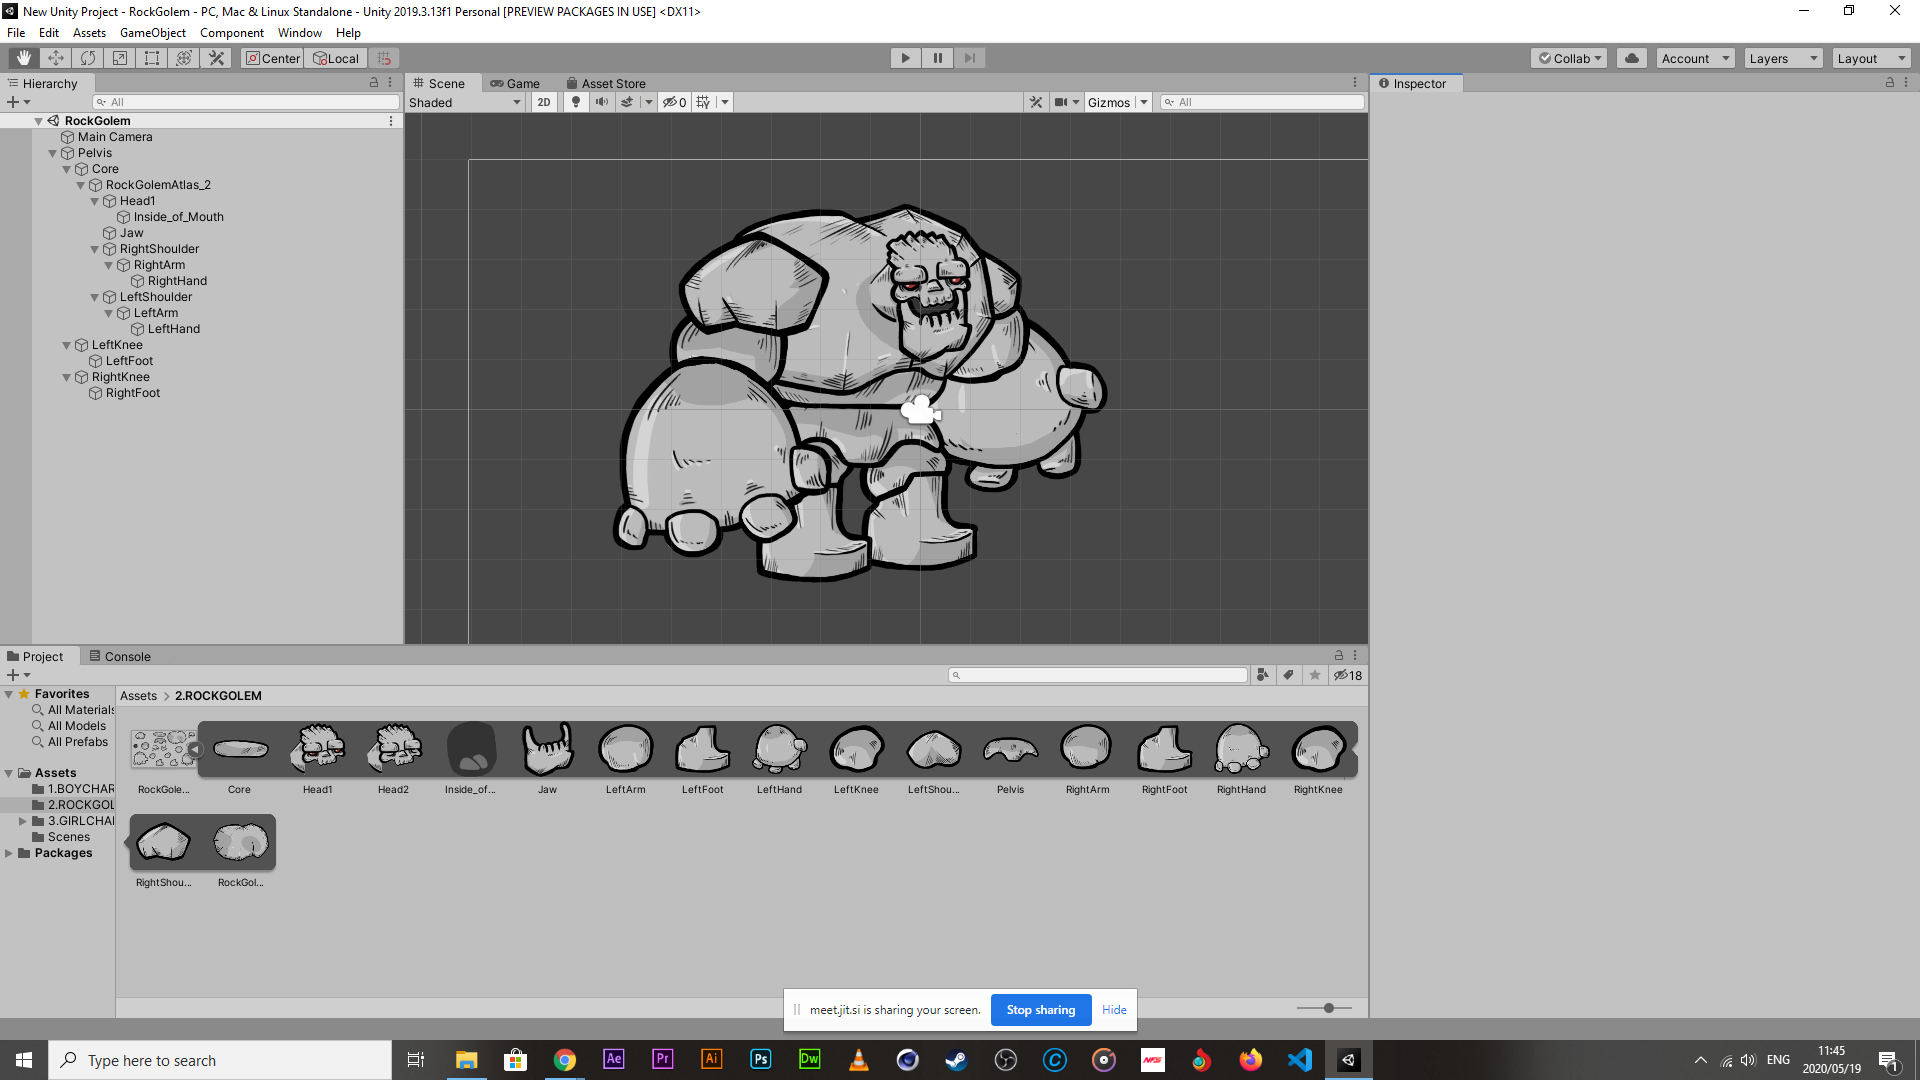
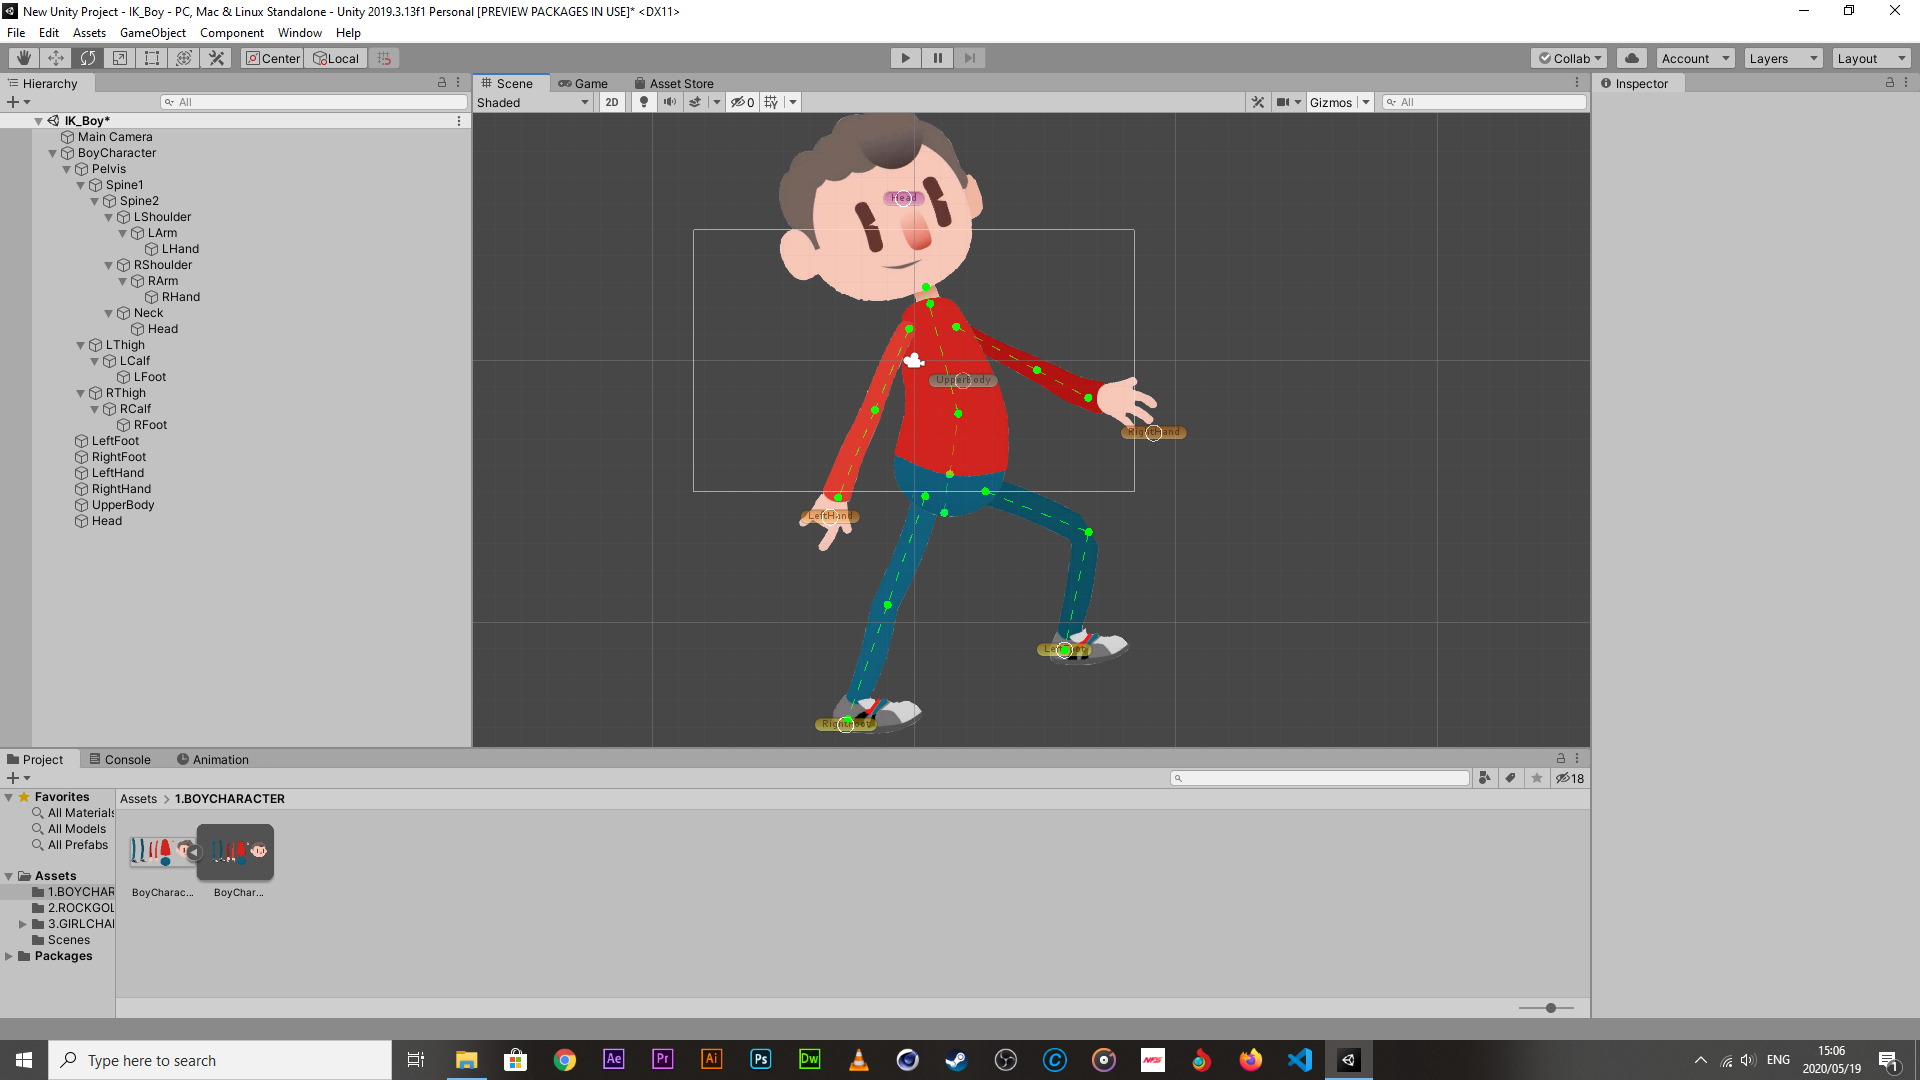
I ran into a couple of snags, both in the rigging department, but also with my character design choices. When you have a character that is made of rudimentary parts, the rig tends to have a seizure when you have no corresponding body part layers to attach the rig to. The general way around this is to create puppet pins in the rough position of where a body part would be, provided that the rig being attached is referencing, but for some reason, my pins would displace off of the character to the bottom-right corner of the screen. You have no idea how infuriating it is when you know something should just work but doesn’t, despite not being any fault of yours. I scoured the forums in search of answers. Turns out that character illustrator files either have to be converted to shapes (which runs counter to how I was taught to use Duik) or they can’t be continuously-rendered, *massive facepalm*. So we generally continuously render for the purpose of ensuring that the illustration is as crisp as possible, but I suppose that my character won’t actually be the size he is when brought into the game, so that minor quality lose isn’t so bad.
The second major issue I had was that my character required a bit of modification for his ankles to work as intended, it usually isn’t a massive issue if you haven’t started seriously animating yet, you can modify the illustrator file without breaking the Afx file, but this time, it messed up all keyframes, which was a massive setback. I fixed the character, re-rigged him, and then went on to animate him.
I went on to create the idle first, seeing as it would be the simplest thing to animate at this point. The breathing was fine on its own but it seemed a bit boring, so I created some minor cloth waving through the use of puppet pins, and a plugin called Autosway. My character feels combat ready already, someone cue the epic battle music.
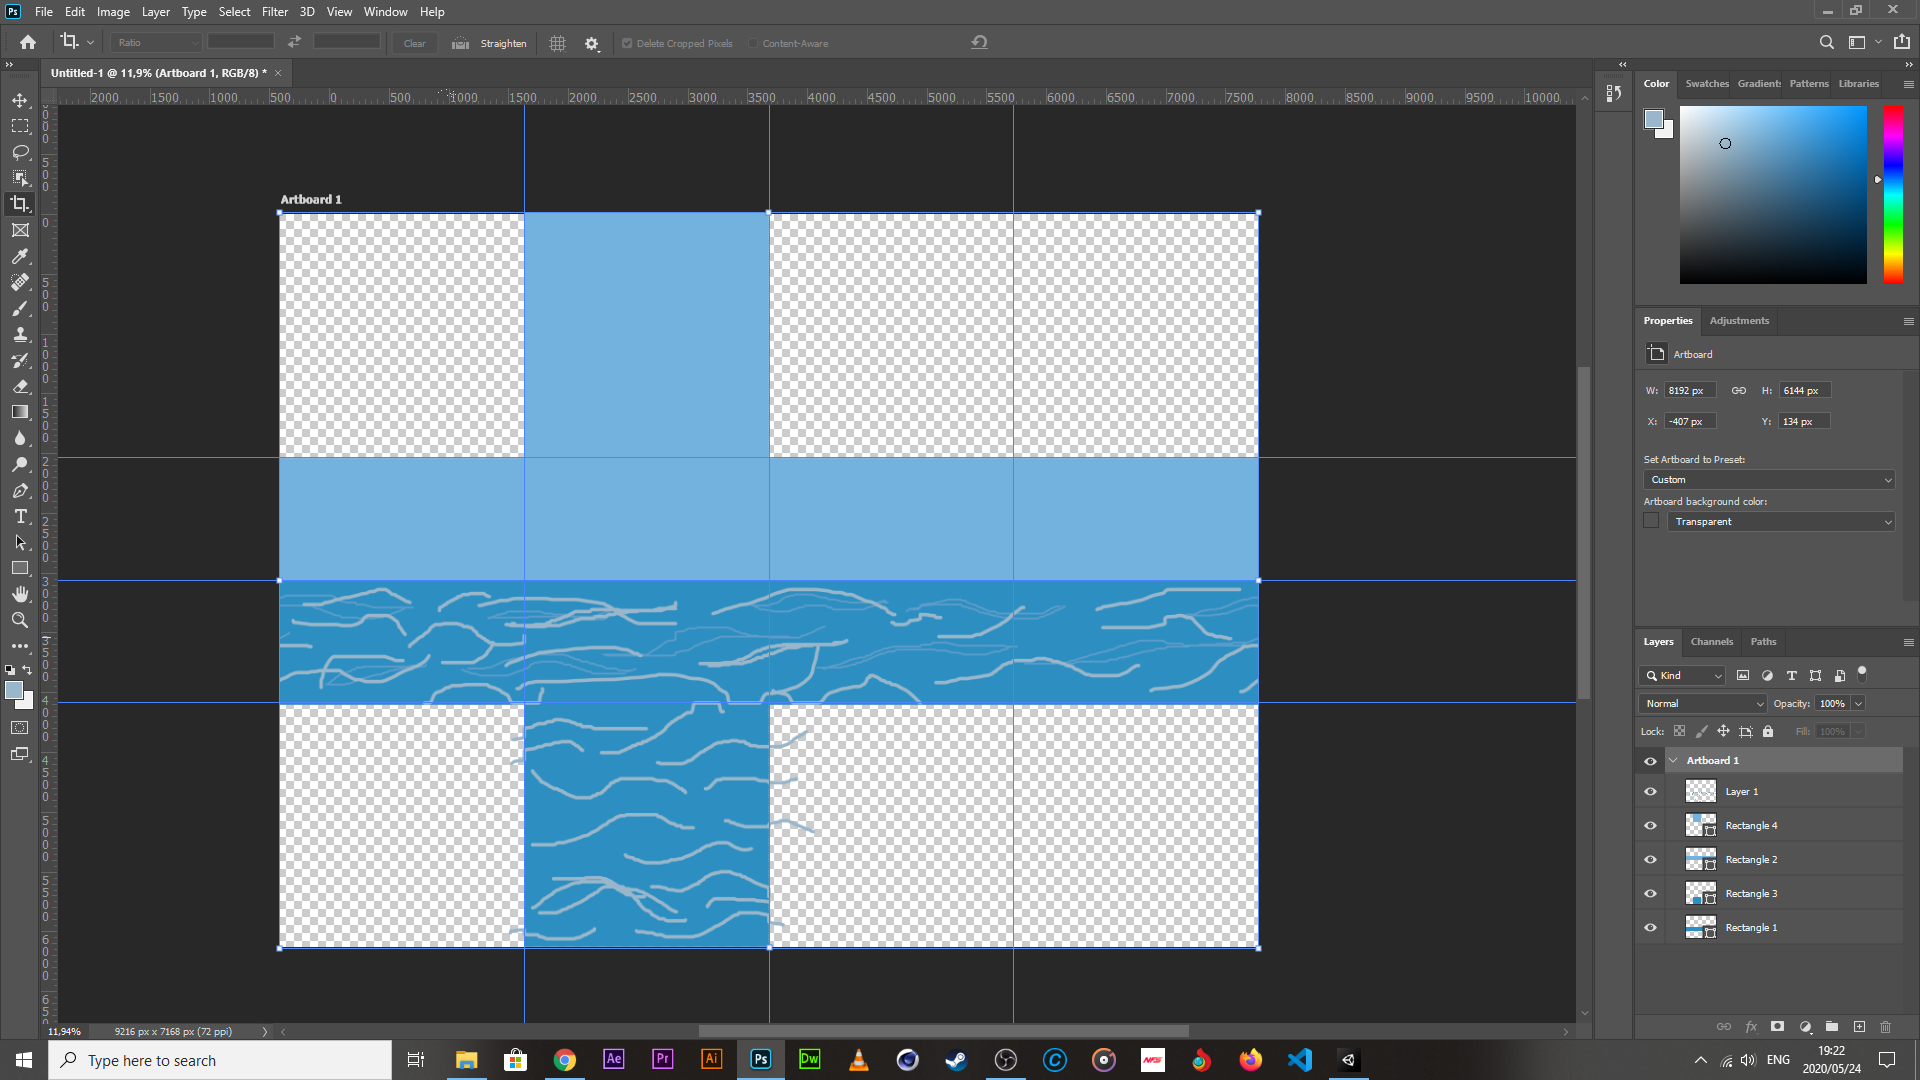
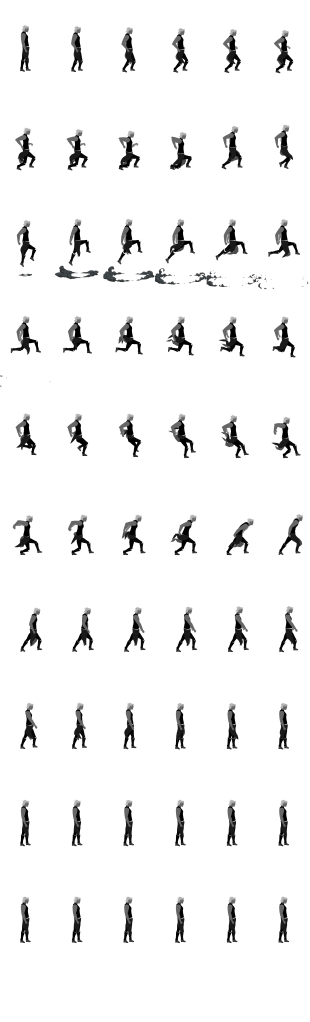
The next step was to move on to the other primary animations, running and jumping. I followed the same steps as above and rig the side-profile and animate them. Everything was going pretty well throughout, but I did run into another snag near the end of the animation process for all three of these. If you take a closer look at my previous images of me in the rigging process, you’d realise that I was working in 1920 X 1080px. At the end of this, I need to be able to bring all of these into a photoshop or illustrator file to create a spritesheet composition. Of course, I didn’t know enough to do this, so I watched a video on the ins and outs.
What it boils down to, is the creation of a grid to the same specs of each of the images (obviously, the specs have to be unified across the board for all of the images in the sheet). To make the grid, I needed to ensure that I was granting the minimum amount of space necessary to each frame, while ensuring that they have enough space for any secondary actions to be added at a later date. To do this, I created another composition in each of the rig files, set the width/height to 800 X 1500px each (I already knew that my profiles were centered to the middle of the artboard originally and afx makes changes of the composition size from the center, so I didn’t have to do any additional math when throwing in the animations into the new comps). Then, it was a matter of exporting them, and then putting them into an illustrator file that had a width that was a multiple of 800px and a height of 1500px; this ensures that when I set the grid options to the image size, they lock to the artboard perfectly, and should I make a mistake, it will be visible immediately. This is what the grid system looks like.

Notice how each image sits in-line with each other and is central to each of bolder red lines in the grid.
One other issue I ran into was that I was working with a frame-rate of 25fps, which is great cause its one frame above the cinematic standard, but all of these frames have to be present for the duration of the animation. It doesn’t sound like much but its roughly 50 – 75 frames that have to be present of one file FOR ONE ANIMATION, which is absurd. Imagine what it would look like if you have in between 7 – 12 animations, you would have well over a thousand frames in the worst case scenario, and that’s without the scene components! Right now, there isn’t really a way to bypass it, but what I can do is create multiple sprite-sheets for each animations, kept in very well organised folders.
17/06/2020
As promised, some of the gifs for the movements of the main character, some are still in the process of being made, while others require some TLC which will happen when there aren’t so many other hanging variables.
So, we have been out of commission for a bit for the exam period as well a much needed break… well, not exactly a well spent break. More than two thirds of it was spent in recovery from an infection, all the while worrying whether or not I passed the exams this term (quite a bit of extra stress was added to this period, we have never had exams at home and the way we were tested was quite different, seeing as I haven’t received a message yet, I can only assume that I haven’t failed yet, but having things up in the air is stressful), still not exactly well yet, but things are looking up.
I’ve spent my time thinking about things as they are at the moment, in conjunction to the story, the main character profile, my skill level, what makes a great game, and the time remaining. A couple of things have become apparent. Ultimately I want to make a game worth playing, something that is incredibly fun, but what makes a game have that quality? I have played games that had, relatively poor difficulty scaling, what could be considered poor graphics, but was incredibly fun to play, the opposite has also been true in certain instances.
Of course, what constitutes as fun differs from person to person, but something that surrounds every aspect of what makes a game fun is the challenge of a learning curve amidst challenges that the game presents. Realizing this, it got me to thinking about challenges that I can present to the player. The most obvious one is the challenge of traversal; mastering movement is by far the most prevalent challenge in any platformer. Moving platforms, insta-gib or d.o.t floors, complex shifting rooms, multiple routes to the same objective. These are all obvious examples, but one thing that I think can be added to that list is the idea of movement itself.
Two games come to mind
Celeste & HollowKnight
Both games have interesting ways by which movement contributes to the challenge aspect of the game. HollowKnight gives the player offensive abilities as rewards after boss fights that double as added mobility that the player didn’t have access to before, allowing him to access areas that were inaccessible prior to that engagement. There are no obvious hints or clues, the player simply follows that natural direction of play, testing out the range and capacity of the abilities to change the landscape when there are obvious barriers to progression, or when an area makes reference to an ability used in a past level by way of recycled game objects. Celeste takes a slightly different approach in which, as much as 80% or more of a level consists of hostile platforms (entities that one-shot the player if they touch them). To circumvent this, the player starts out with the added abilities that contribute to movement but differ from the range of movement that a platformer is accustomed to having. It is up to the player’s puzzle-solving skills and timing to navigate the level. The challenge comes in with the levels having a more unfavorable ratio of hostile/normal platforming, that gets progressively worse as the player navigates the game.
I think that the Game Maker’s Toolkit describes what I am referring to best, a watch well worth it, if for no other reason than to get an idea of what the game is all about if you never played it.
Of course, it would the biggest win to me if I could achieve something on the level of HollowKnight, but I have to be realistic here; The level design took them months to figure out, as well as the balancing of abilities, there is insufficient time to do that, and it would require knowledge I just don’t have, and I cannot confirm that I can get at this stage, so that option is out. Celeste is more achievable to some degree. It would require the creation of a slightly different player movement script, with the added functions of a dash and wall-grab (animations are being designed for these AWS).
That is what I have been spending my time doing so far, trying to understand what makes this game so good. I’ve gone about creating a new player controller largely based of Mix & Jam’s tutorial based on the game (still in progress, but as soon as its done, I will post screenshots).
Now there are other things to consider. The way the map is designed needs to be reconsidered, as the nature of the game itself is different to what was initially conceptualized. Naturally creating a game centered around traversal as its primary challenge, is there even really a need for enemies? Would it make sense to put enemies in a game where the challenge is derived from executing and timing predictable routes around obstacles? I have been thinking about this for a while, and it doesn’t make sense to put enemies to defend a position that is already hostile to the player, nor does it make sense to the backstory, but what if the enemies were already fixed in the environment?
There was this game called “The Way of the Ninja” which was later abbreviated to just “N“. It was a game about a ninja with a hunger for gold. This ninja would break into facilities and steal the gold as he went from level to level, however, the levels would become increasingly more difficult with the addition of mines and turrets which would limit (and ultimately kill him in one shot if the player misjudged his route).
I think the inclusion of magical turrets could fill the roll of enemies, as well as not break the lore concerning the presence of enemies from various factions being trapped in the Fog. I still have to decide whether or not I give the player a means to engage the turrets or if I do it like they did with N and its sequels.
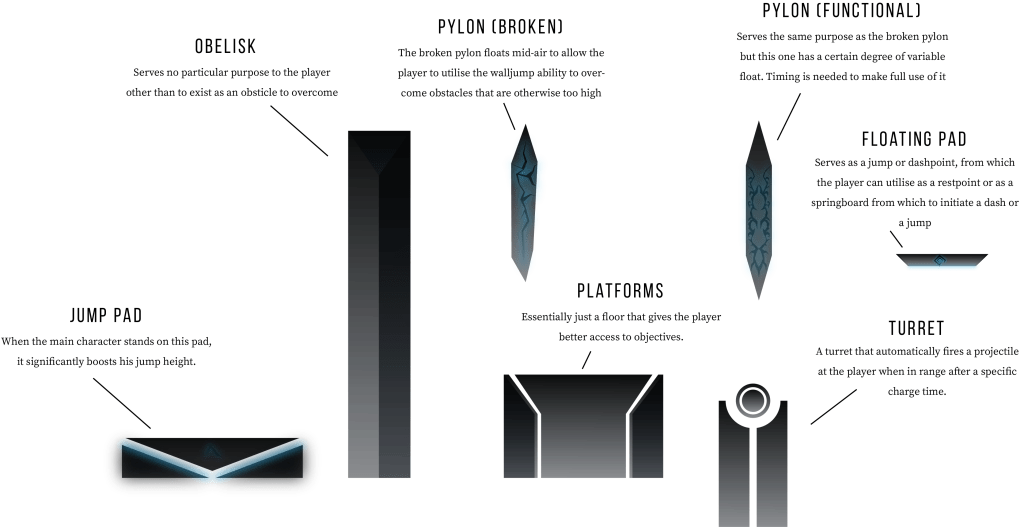
I have created various platforms with various functions to assist and deter the player. Unfortunately, the level design elements aren’t completed yet, but as soon as they are, they’ll be posted.
20/06/2020
After some trial and error, I managed to create my background scene area, import it into Unity and start the level building process with the sprite shape tool based on these tutorials.
Unfortunately I don’t have my custom player movement script done yet, so it’s gonna be some time before I can start playing in it and tweaking the movement metrics and add enemy AI. I also noticed that using opacity to give the materials some color variation was not the smartest idea ever (some of the background is showing through the game objects, which would be fine if they were on a plain not interactive with the player), so I’m gonna have to make some quick changes.

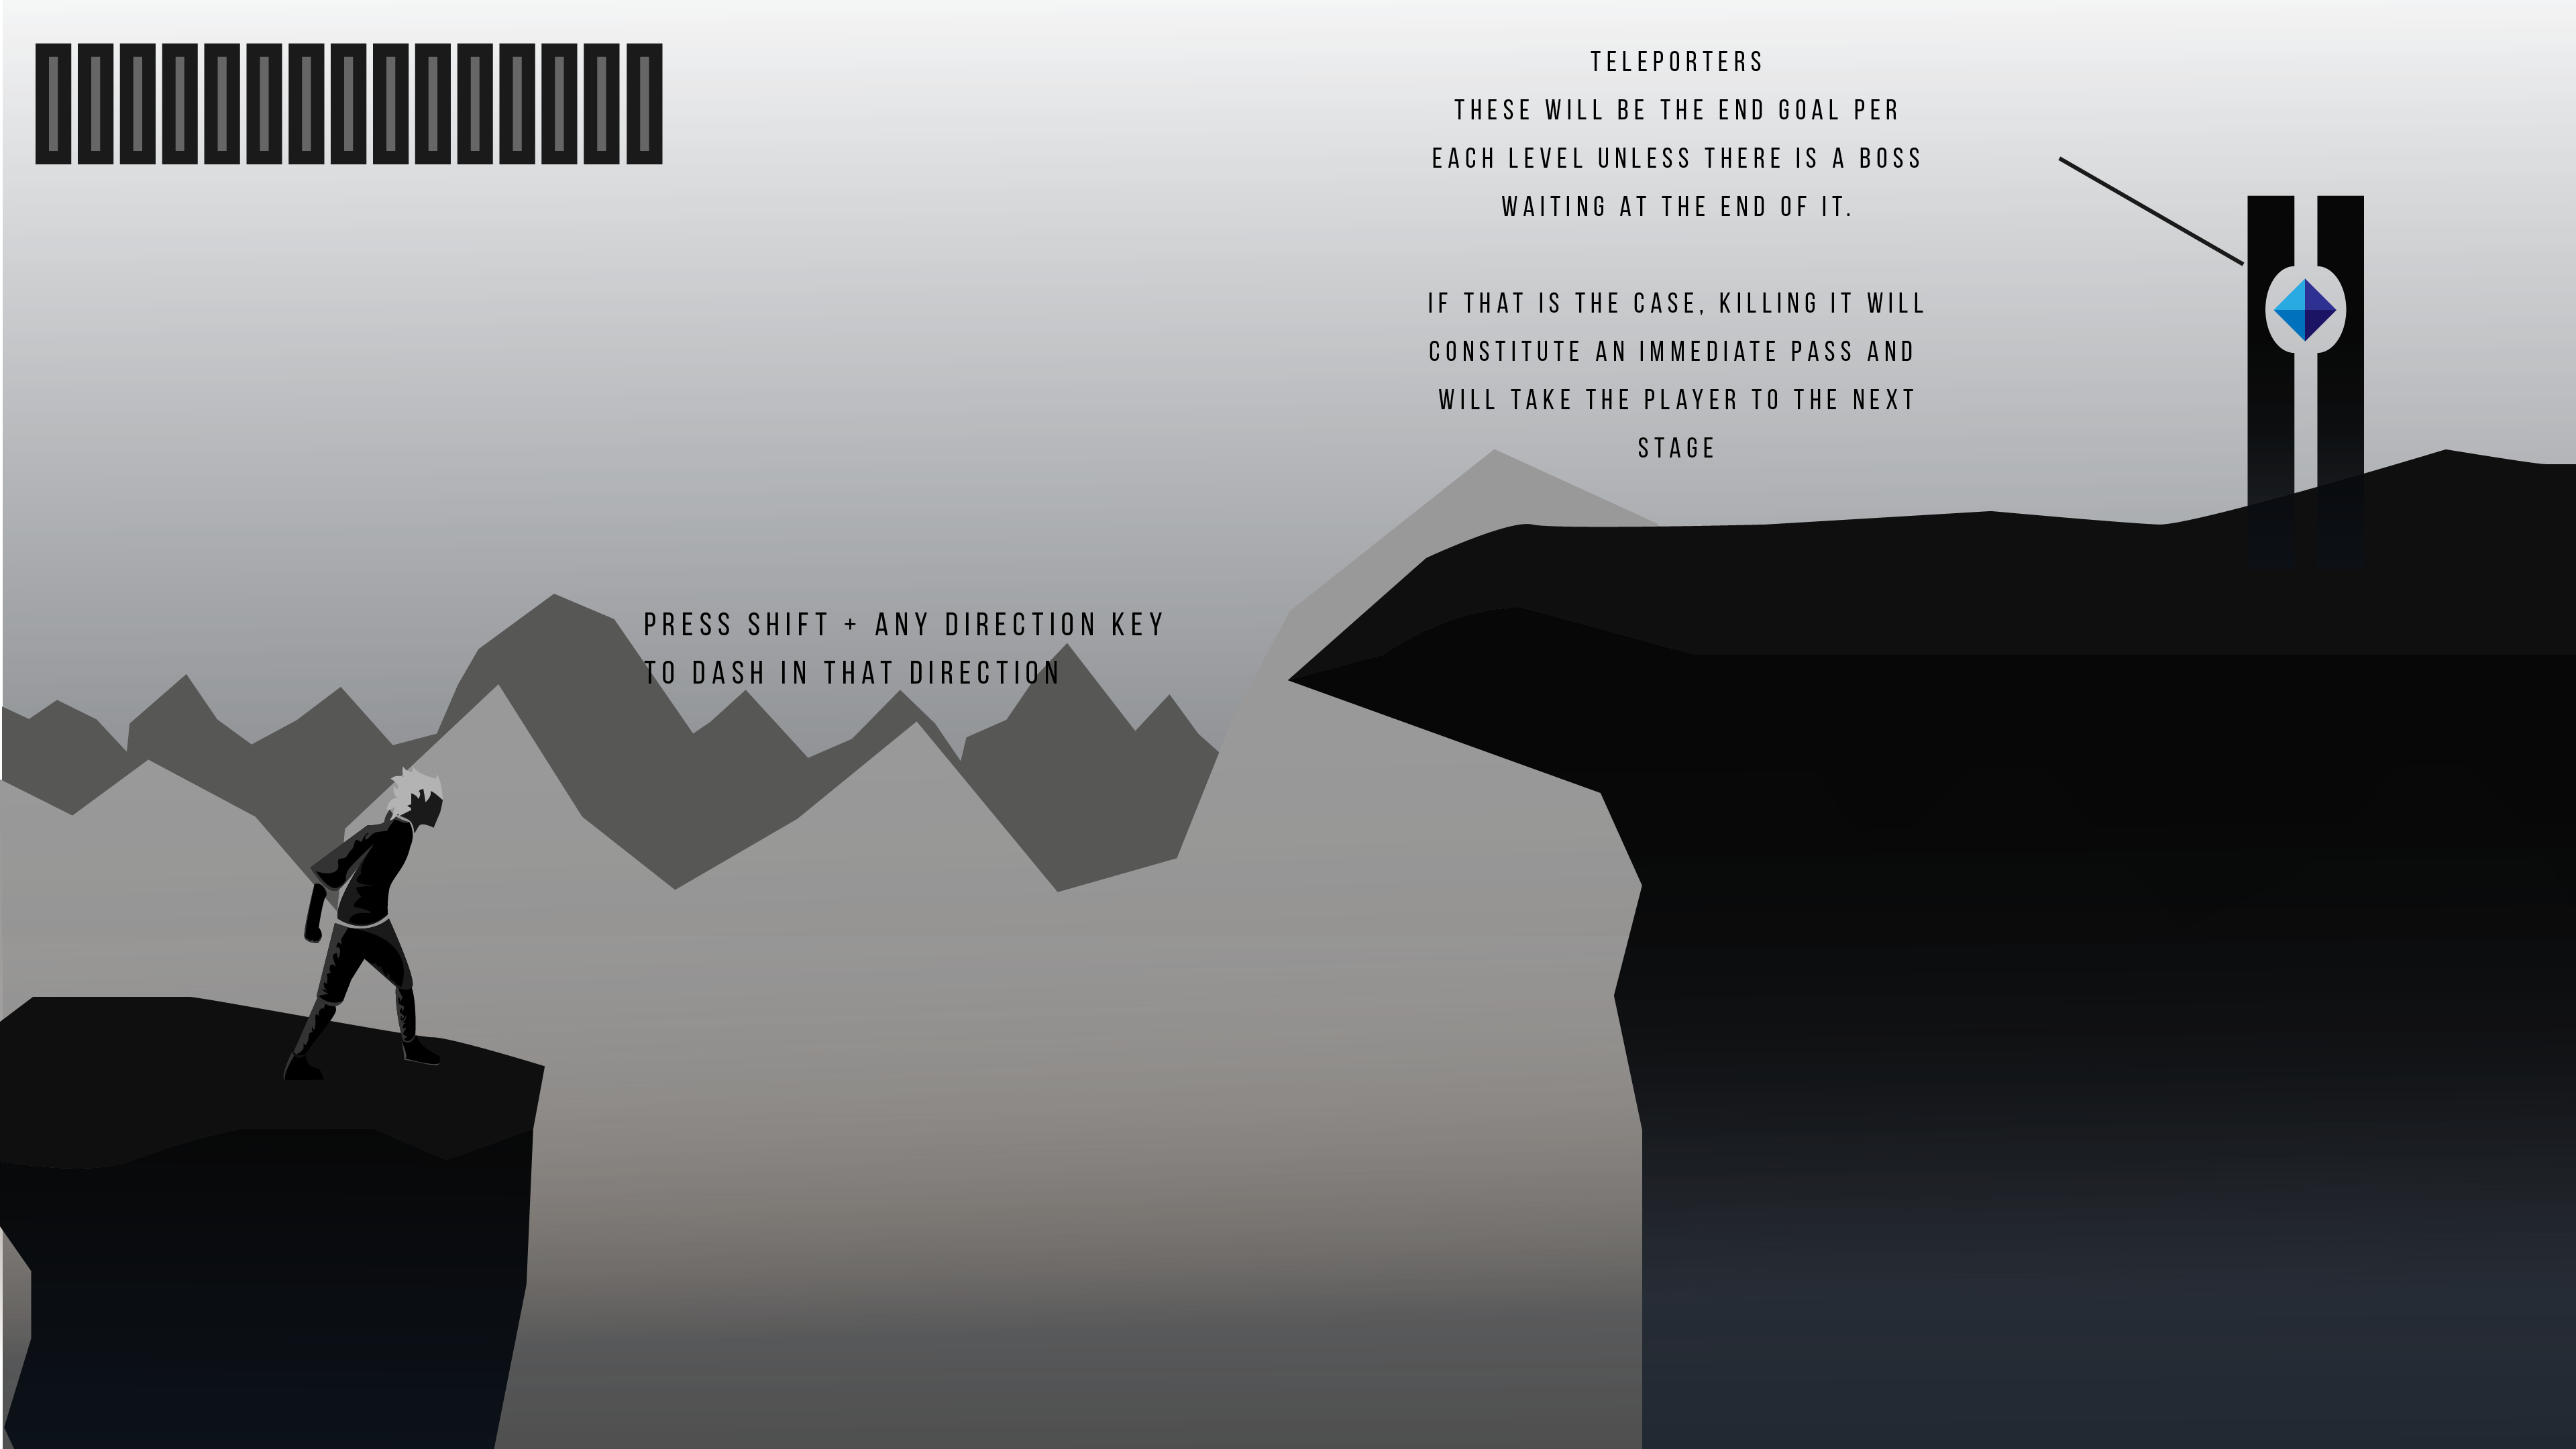
If it’s any consolation, some of my game object animations are coming along. This one is for my teleporter (level end objective). Still working on its active state. It takes quite a bit of time to modify the 2D effects, but when I’m done, there’ll be a nice repository for me to re-use and make better 2D stuff.

29/06/29
Good Morning ladies & jays, sorry for the late post. It has been a hectic week. I couldn’t post to you even if I tried, but its a good thing that I didn’t because every second word would be a profanity against God and nature, yes… that bad of a week, I’m sure you can guess which hell I crawled out of this week.
Unity had died on me, no word, no warning, just a mass corruption of data, I had a backup but no dice, tried reinstalling it, which pushed it to a new version. Fortunately, Unity has a retro-activity feature built-in allowing the user to download a previous version of the engine provided it isn’t far away, I used it but for whatever reason, it just wouldn’t load up some assets and my movement script was wiped. So I started over, at least I have the knowledge to make it and it won’t take me an eternity.
So here is where I am now:
A new jump animation has been made, I wasn’t happy with the previous one.
The player script I am busy with constitutes the need of a wall-hang and wall-slide, so I designed and implemented them.

Note: The character faces the opposite direction when compared to the other sprite-sheets on purpose. The video below is purely to show the subtle hanging animation.
I am further along with the new player script, which currently has your standard left & right movement (with direction adjustment) and jump, double jump (I managed to remove the infinity jump glitch, I might remove the double jump depending on how good I can make the dash), a wall-hung, complete with animation and wall-sliding (much more difficult to engineer than I thought). I just need to make a dash, an after-image, and figure out how to do interactive elements for things like the teleporter) which puts me further along than I was when I was making the previous one.
Here’s some footage of the new script in action.
My scene objects are done and dusted, but as you can see there is a small issue with the way its being rendered, as you can see that the background is showing. It took me a while to figure out but it eventually came to me. The sprite on the Game Object sheet were designed with gradiented opacity values. The closer to the top of the sprite you are, the more saturated it will be. As annoying as it is, its a relatively easy fix, (I just need to remove the opacity gradient on all of those objects, and adjust the gradient values accordingly).
I should be done with the player script and its subsequent animations by today, and tomorrow, the game objects will be rectified.
06/07/2020
Update Time:
So, a lot has changed since my last update (sorry I couldn’t post in so long, my finances have been a bit short for the last month and I needed to buy a new car battery, I’ve had very little left over for data, just enough to get some of the tutorials I needed) so I’m gonna break this post up into a couple of parts: WHATS DONE (I’ll explain this part in detail), WHAT NEEDS TWEAKING (I’ll elaborate on what the function is and what needs to be changed, and lastly WHAT NEEDS TO BE DONE (I will only elaborate where necessary).
WHATS DONE:
Character Script
- Basic 2D movement done and optimised to my liking.
- Jump Function (Fall improved, closer to how most games have it with an exponential downward fall velocity (less hang time).
- Double Jump (disabled for now to increase the players need for wall jumps and dashing
- Dash Function (exactly how it sounds, a dash in a single direction at a sudden increased horizontal velocity
- Wall Slide (Slowed vertical descent down vertical surfaces allowing for horizontal jumps in the direction opposite to the wall)
- Wall Jump (explained above)
Environment
- All Background assets imported and made ready for use
- The floor sprite has been turned into a Sprite Shape for easy access and creation between multiple scenes
Cinemachine
- Cinemachine included onto the prefab setup scene (I will explain below) and set to follow character.
Scene Switch
- Scene switch script created (functions as intended)
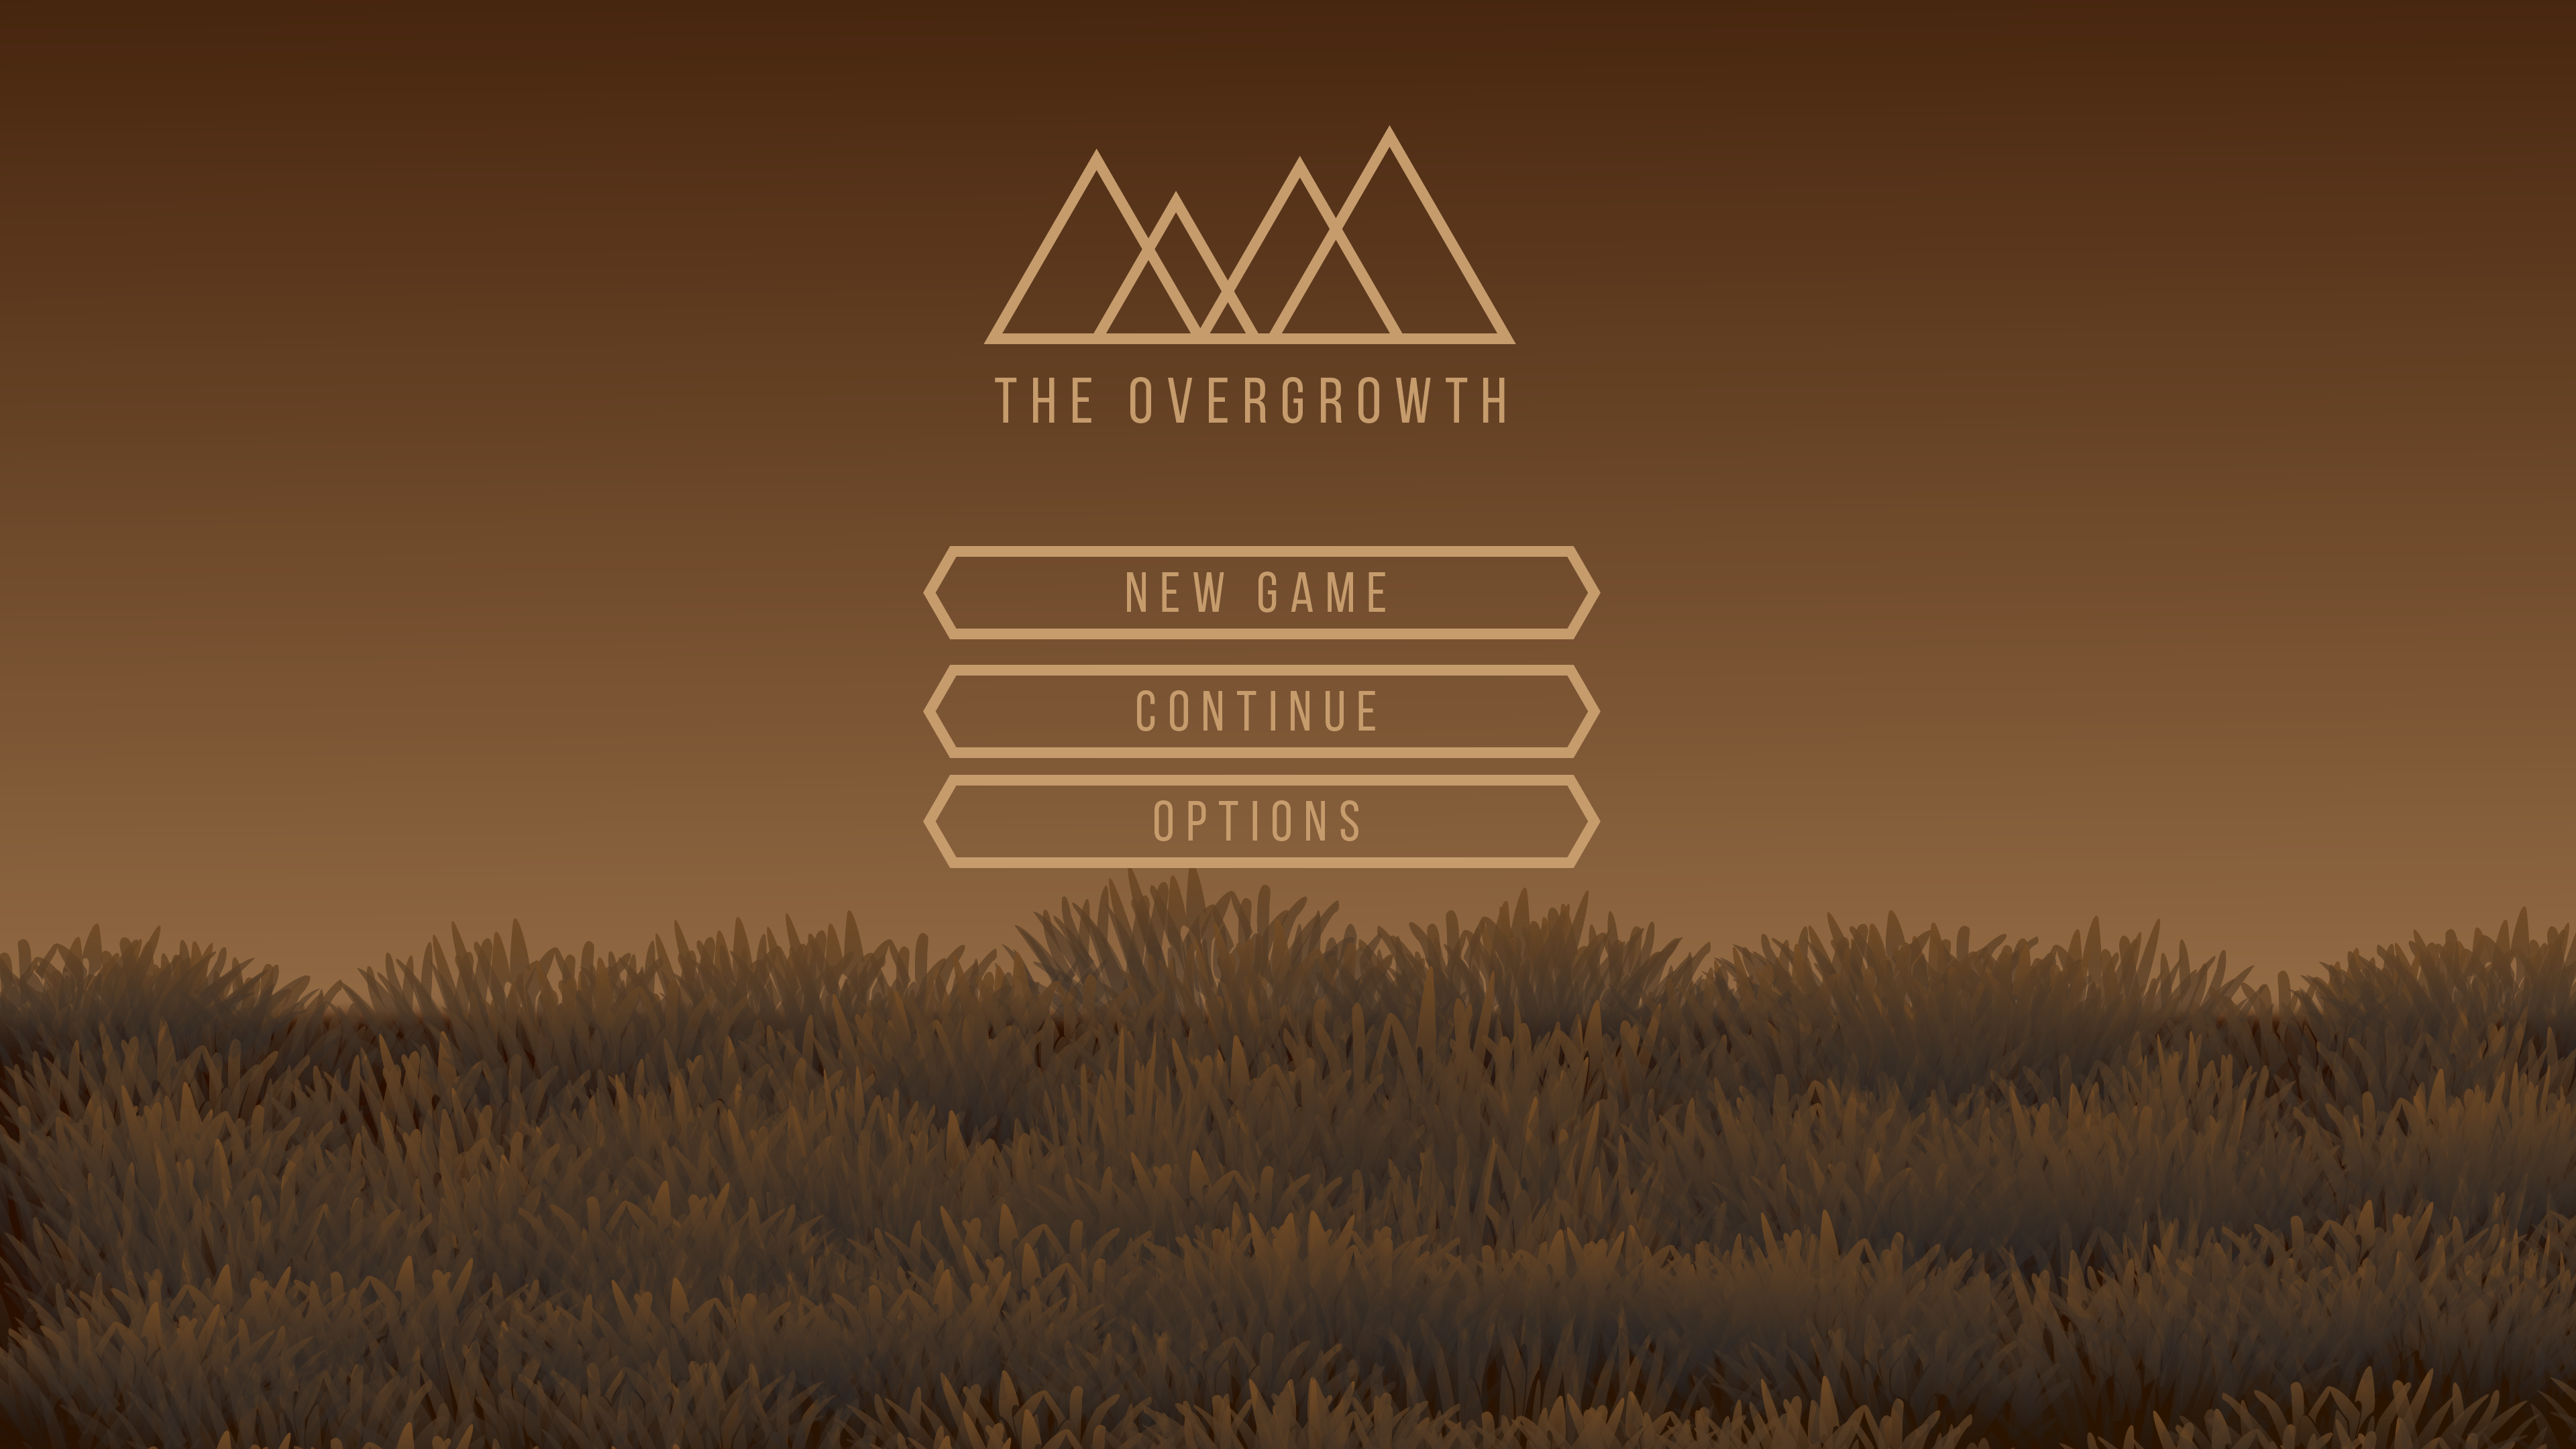
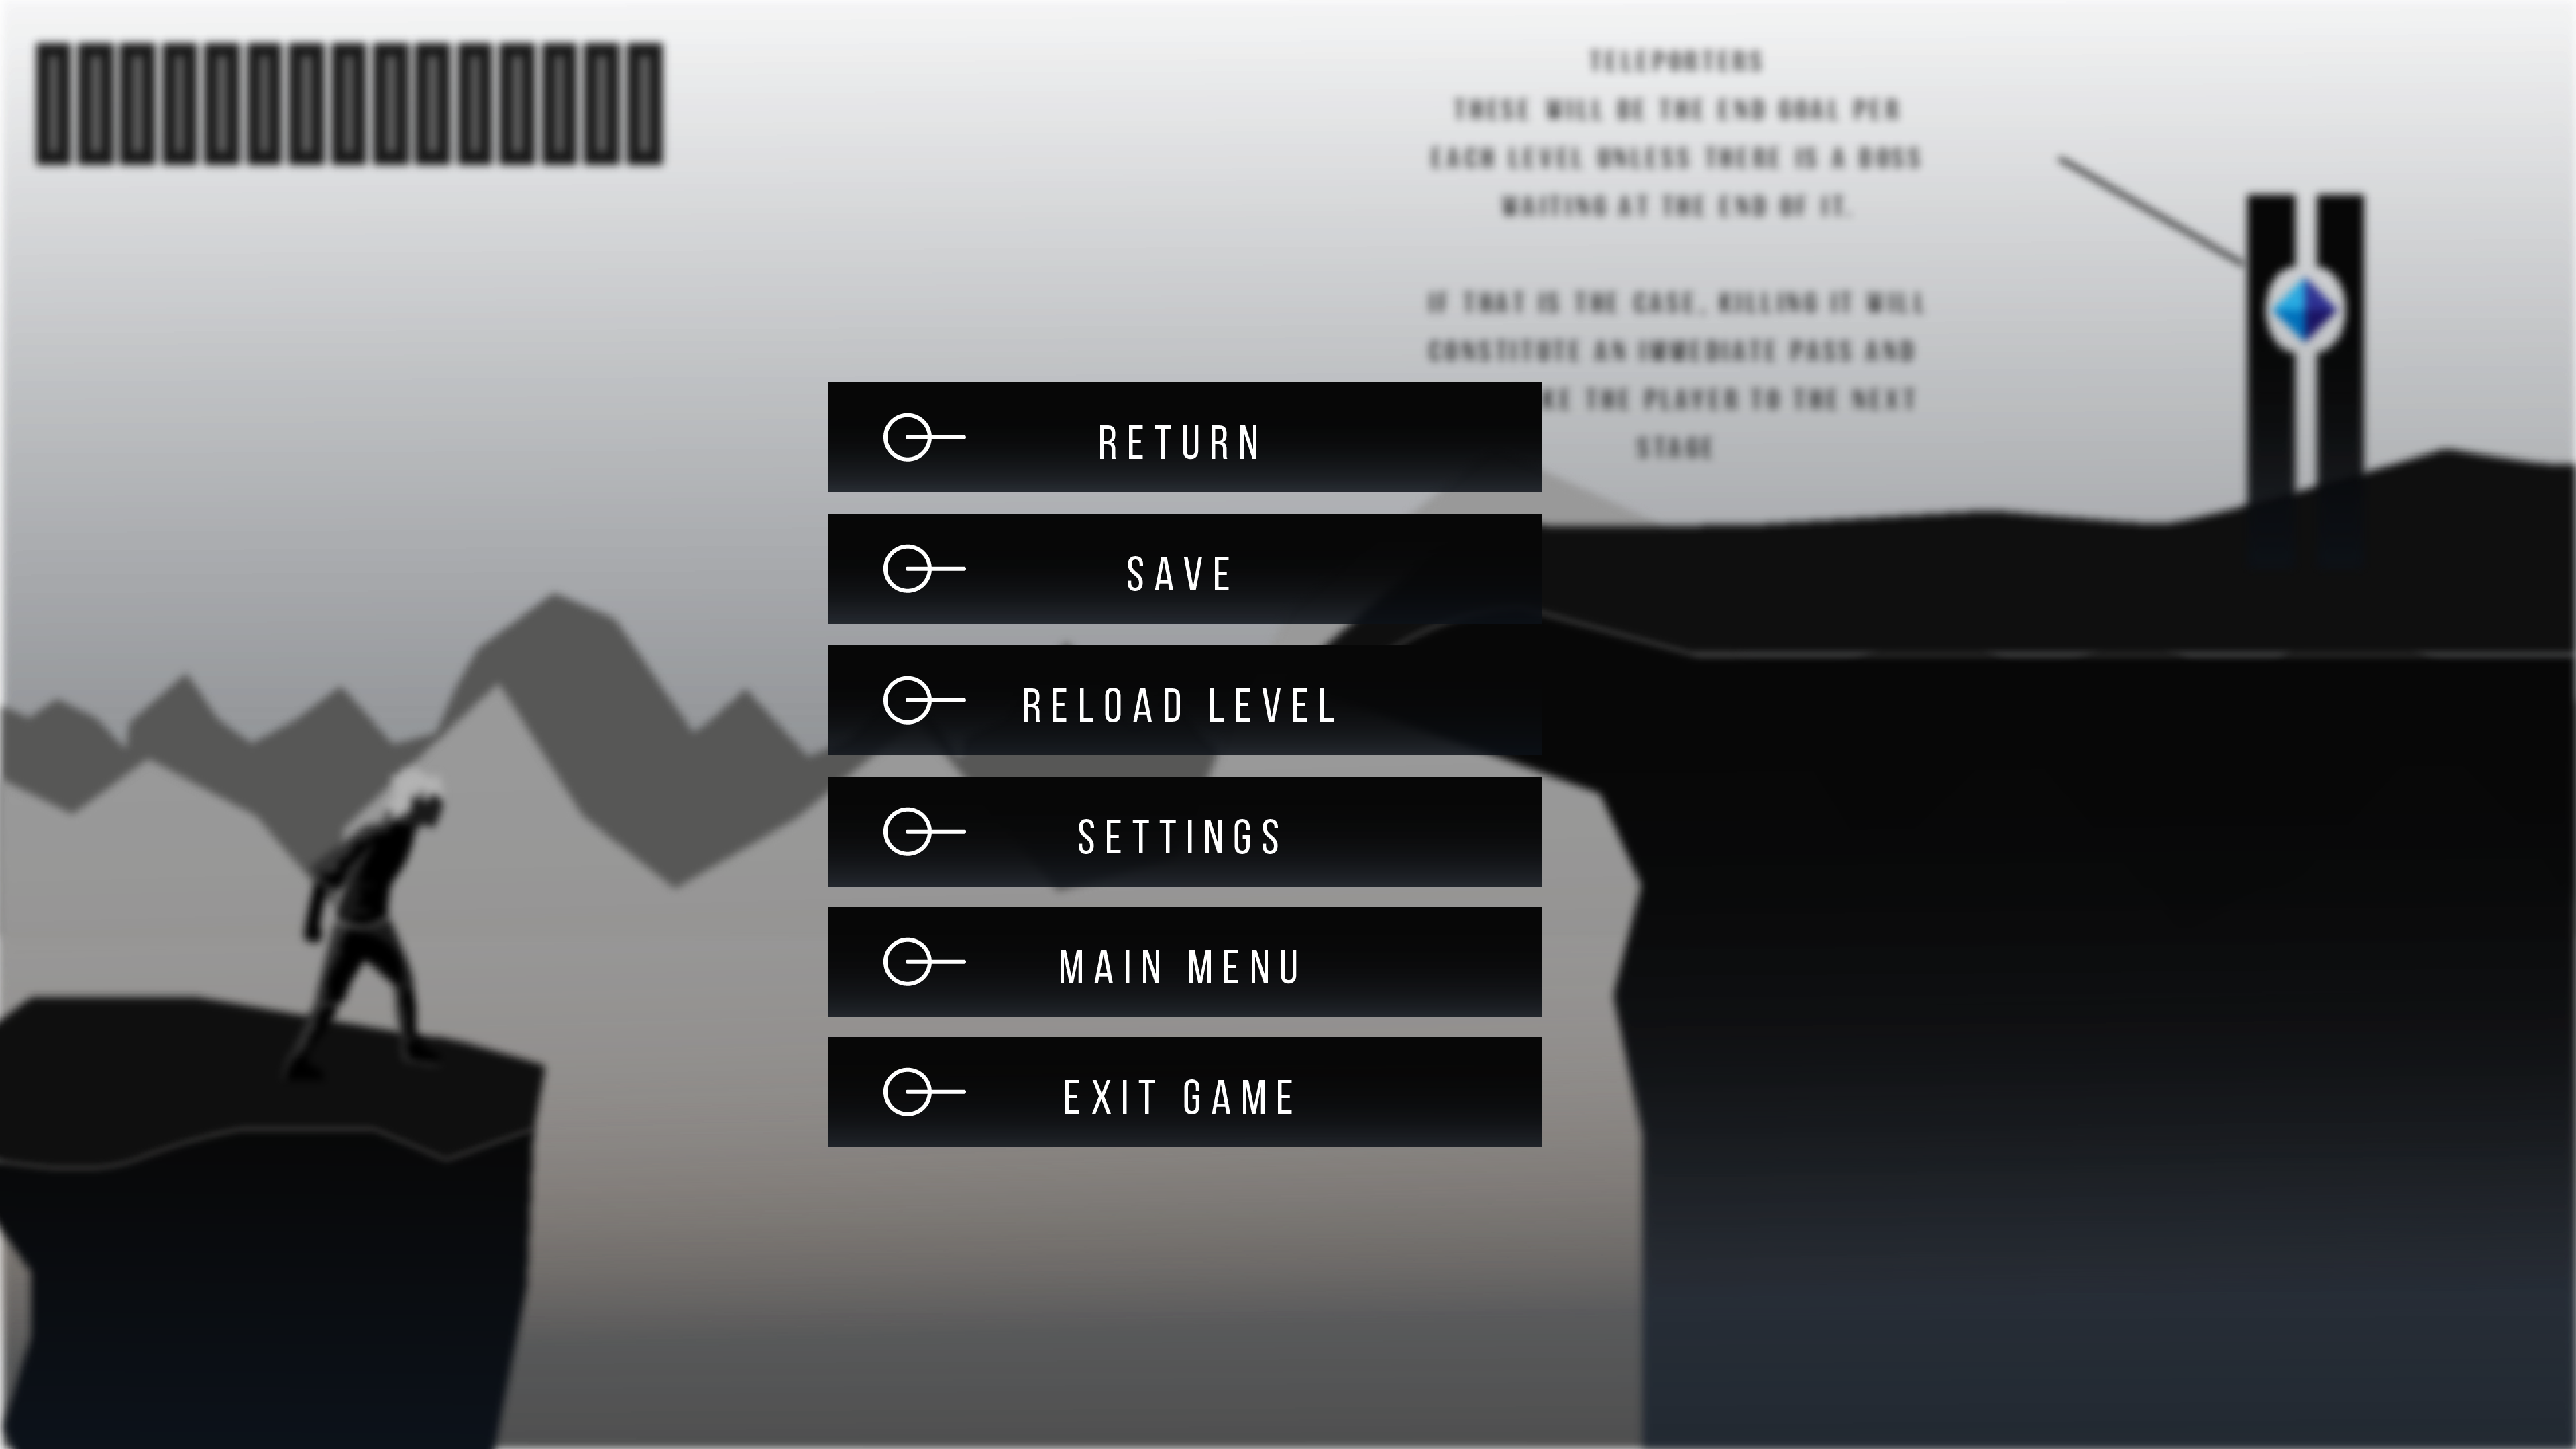
Main Menu
- Menu and Menu Button Prefabs (Complete with custom hover, selected and deselected animations) have been created and prefabbed (play button and quit functions, options soon to be added).
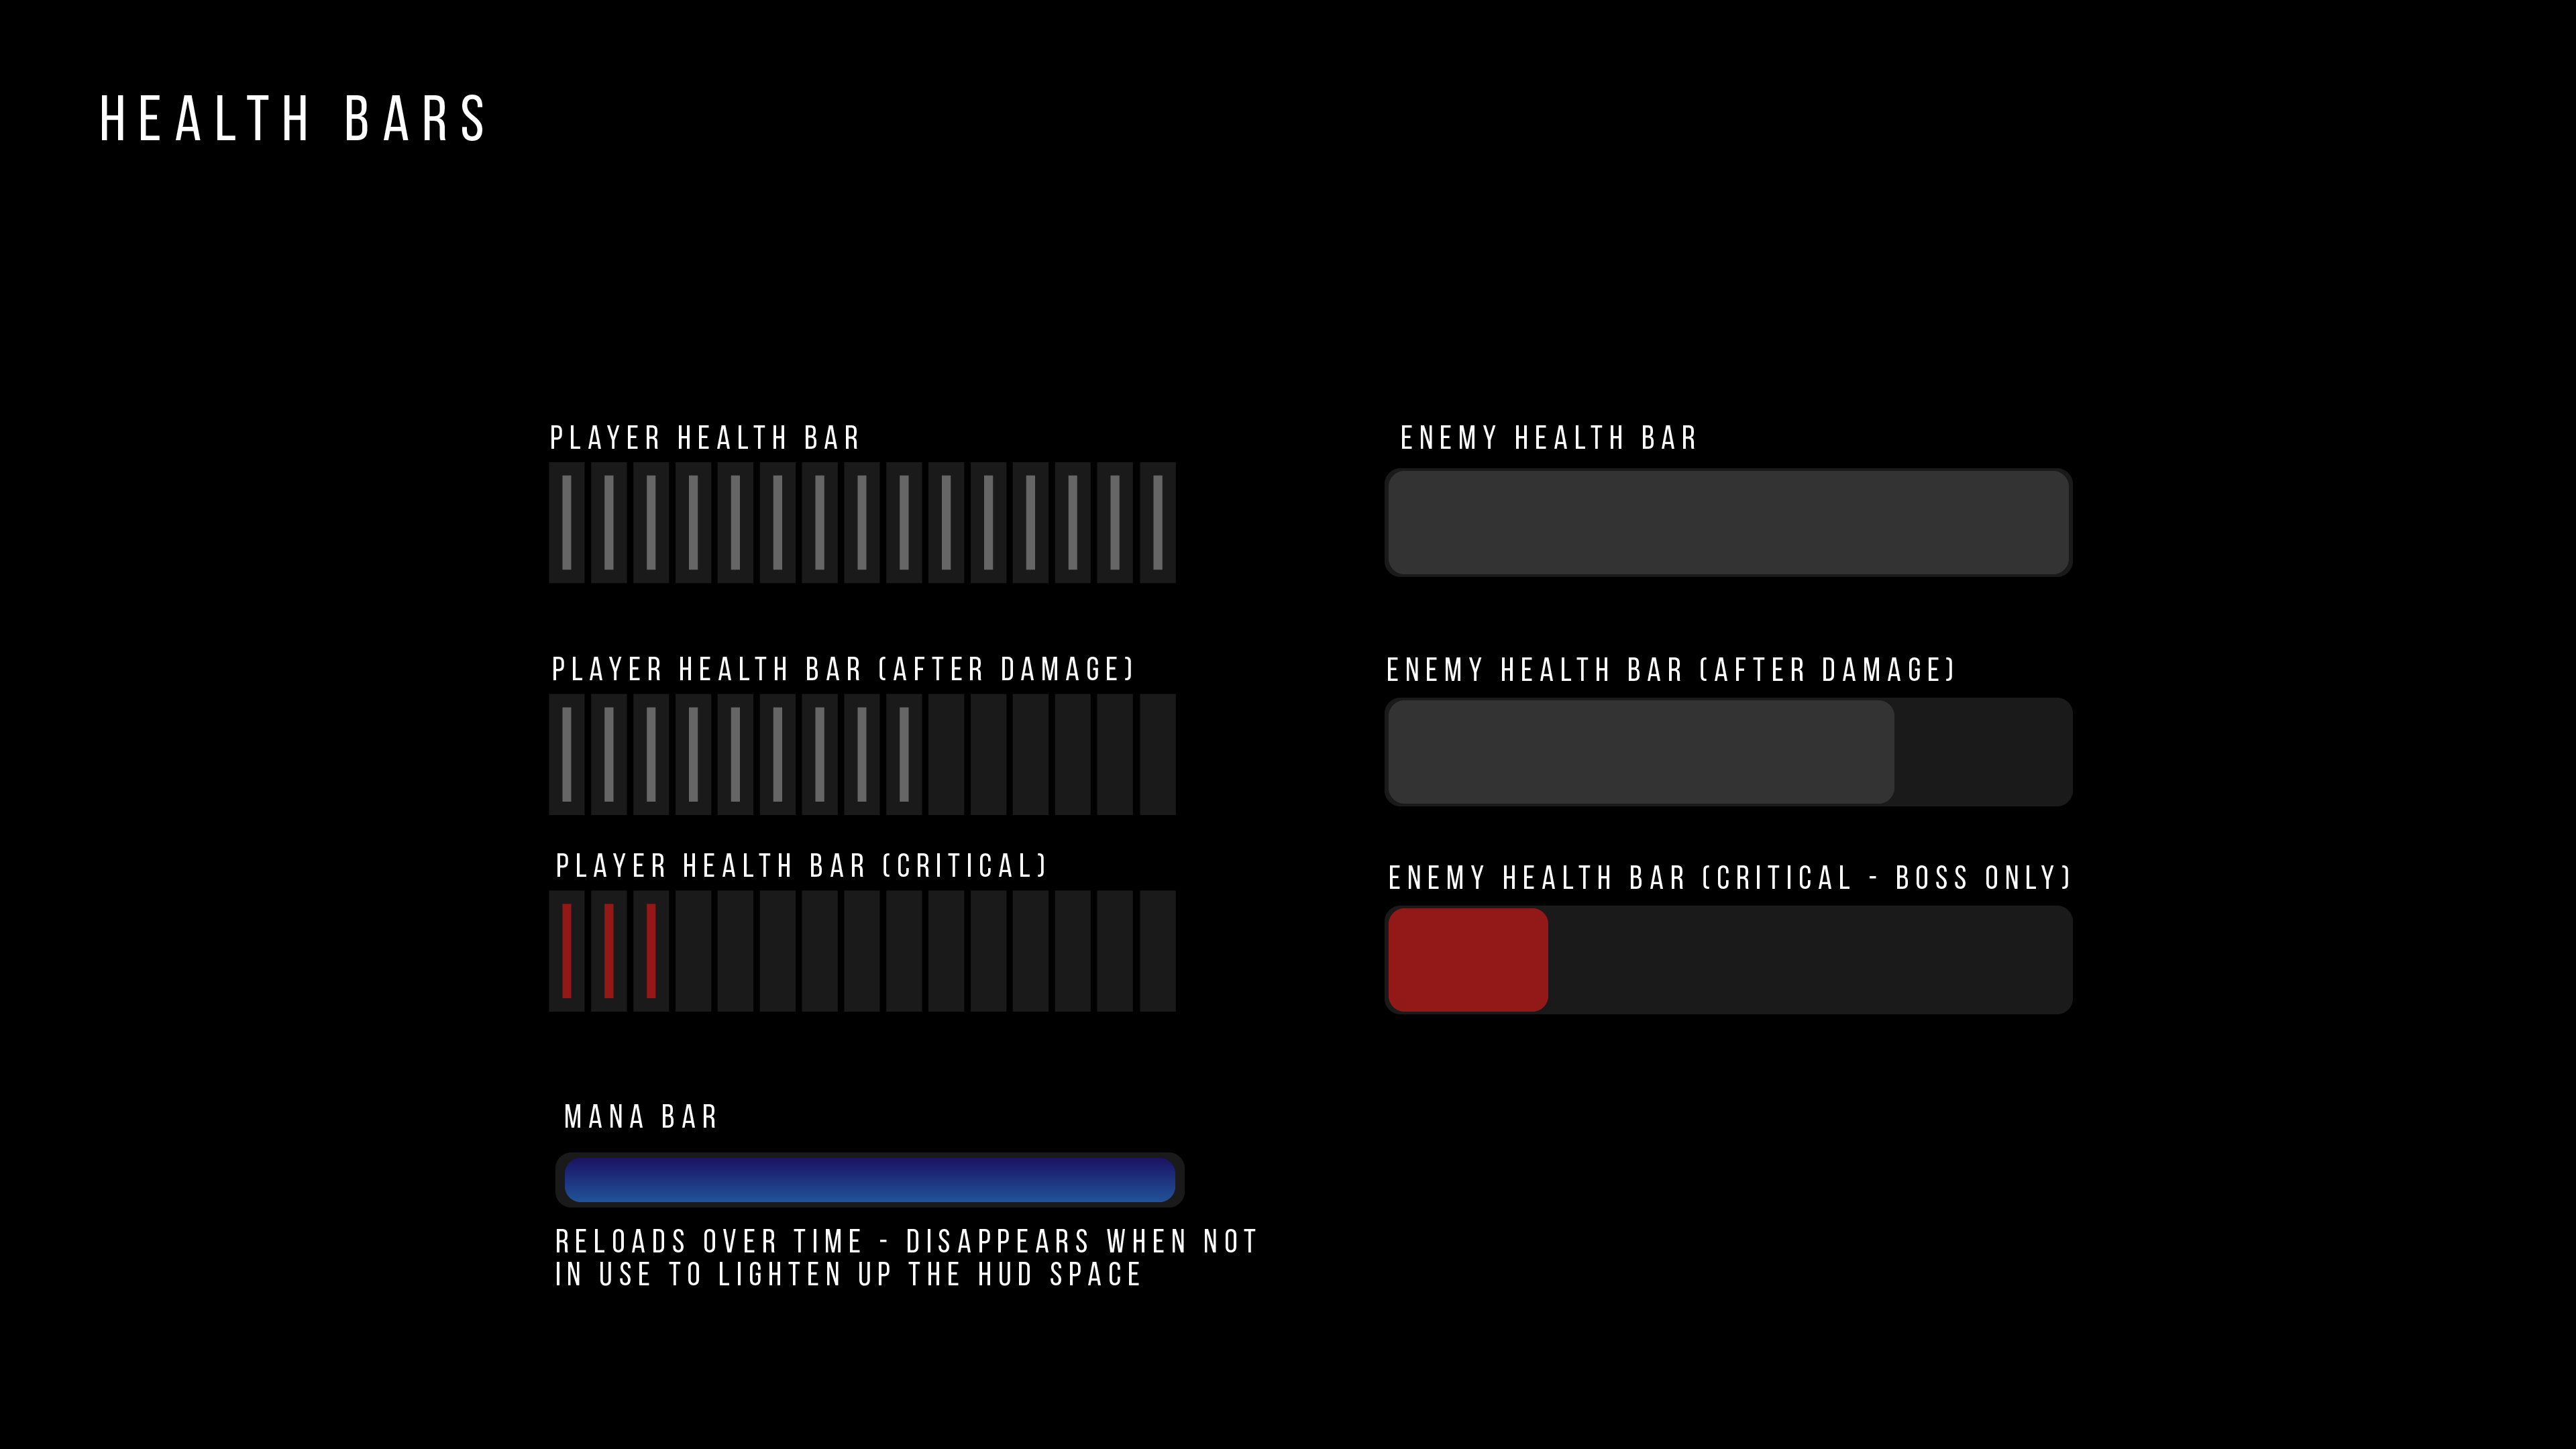
Health Script
- Health Bar (Displays damage to health, health left, updates with health-pickups (pickups still needed but depending on the length and ease of the level, I might not include them, the script for it is ready though)
- Damage (Created a flexible script allowing for variable damage and player push-back on anything with a collider, I can set custom damage numbers and the health script and health bar will update accordingly, so I can use the same script for floor spikes, ceiling spikes, projectiles, etc, and they can all have different damage values)

Game Objects
- Primary objects created and prefabbed (with their functions and scripts) for easy level building, some fun ones are still outstanding but they are apparently the easiest ones to build, will try to get them done today, their sprites are doing and waiting.
- Secondary texture included onto the primary sprite sheet, a PBR has been introduced, so now there will be an epic glow with bloom and lighting on all game objects (with the exception of the Sentry and the player, for now); Learned from the tutorial below.
The Setup and Result:
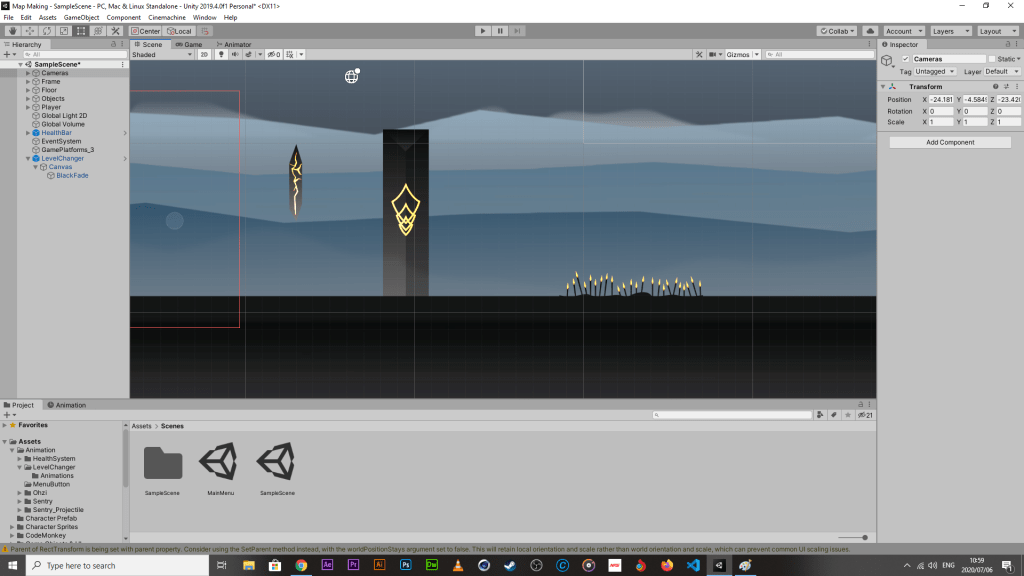
The Glow and bloom is using a single sprite sheet with multiple game objects on them, allowing them to use a single Emission Map for all of them, meaning that they all get the same color, glow intensity, bloom, etc. They will remain consistent, you wouldn’t believe my excitement when I got this working!
Game Objects Continued:
The Sentry (Enemy) is complete!
Once the player is within a certain range, the sentry tower will charge the attack and fire (the charge is a custom animation separate to the actual projectile, meaning that once it’s launched the projectile, it will quickly go back to its IDLE for a micro-second, then charge another projectile and fire it on an event marker on a specific frame of the charge animation, provided the player is still in range) and launch a projectile. Each projectile locks on the player position, and on contact with the player collider (or after a set time, whichever comes first), the projectile plays the explosion animation.
If you pay close attention to the health-bar, you can see that each projectile does a tick of damage to the health bar. The damage script is flexible enough to be included on anything (its own those spikes there as well and does slightly less than a full tick of damage).
I also included showing off the dash function.
WHAT NEEDS TWEAKING:
Player
- Dash function needs some sort of trailing effect, otherwise it looks a little strange
- Jump animation needs the smoke plume removed; couldn’t compensate for vertical acceleration so it looks strange when the plume lifts with the player.
Main Menu
- The main menu boxes need to changed out to better looking ones ( the ones on there currently are only there for the purpose of testing out making button animations, it would have been a waste to create custom ones only to find out that for some reason I can’t do custom button animations)
Environment
- It would be nice to have rolling fog in all my scenes (busy researching it, if I don’t find it, it isn’t the end of the world to not have it).
Cinemachine
- Level borders need to be created so that the camera doesn’t go out of bounds, will be done once proper level creation is done.
Health Script
- Health bar size needs tweaking, need to figure out how to constrain canvas’ screen adaptability. UPDATE: AS OF WRITING THIS LINE, THE SIZE ISSUE HAS BEEN RECTIFIED AND SHOULD SCALE APPROPRIATELY ACROSS ALL SCREEN RESOLUTIONS Image below shows the UI scaled appropriately.
- Death and Respawn needs to worked out. I could easily just destroy the game object and use the particle system to create a burst or something, but it wouldn’t really do it justice (if there’s time and I come across a method to include an animation, I will build one).

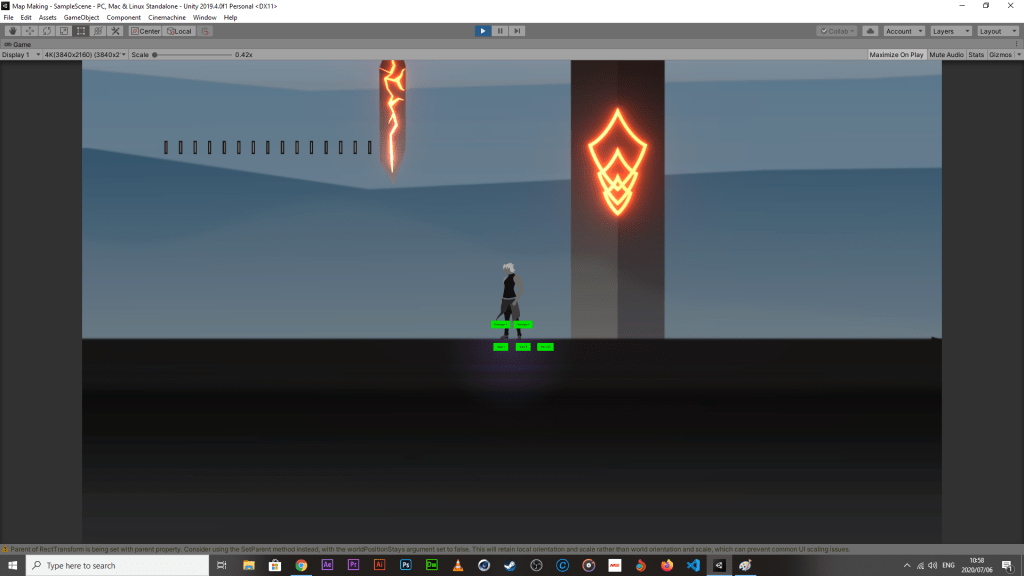
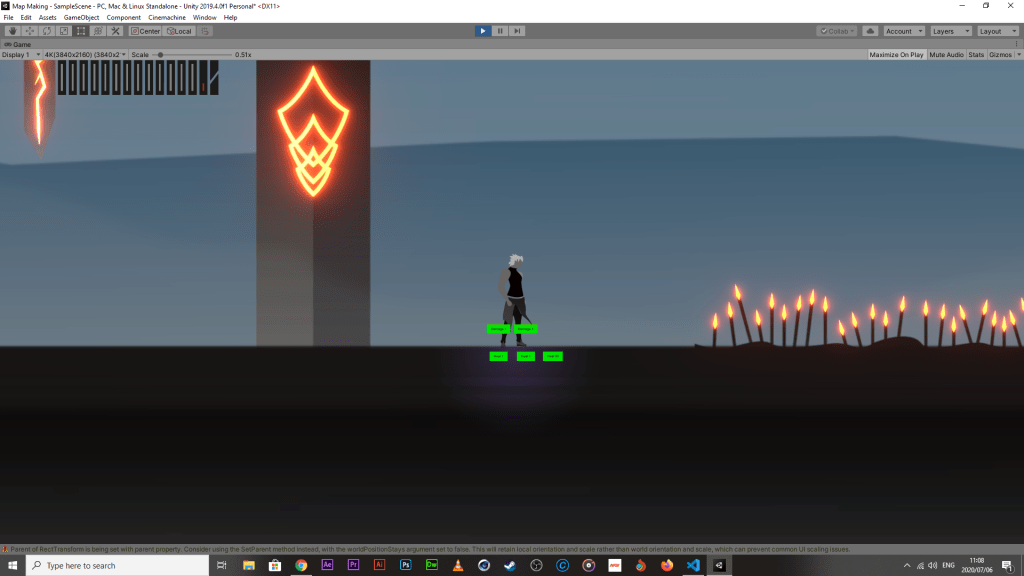
Ignore the green buttons, they are there for debugging purposes and won’t be included into the final export. They trigger damage and heal at various amounts to test the Health-Bar functioning across scenes.
WHAT NEEDS TO BE DONE
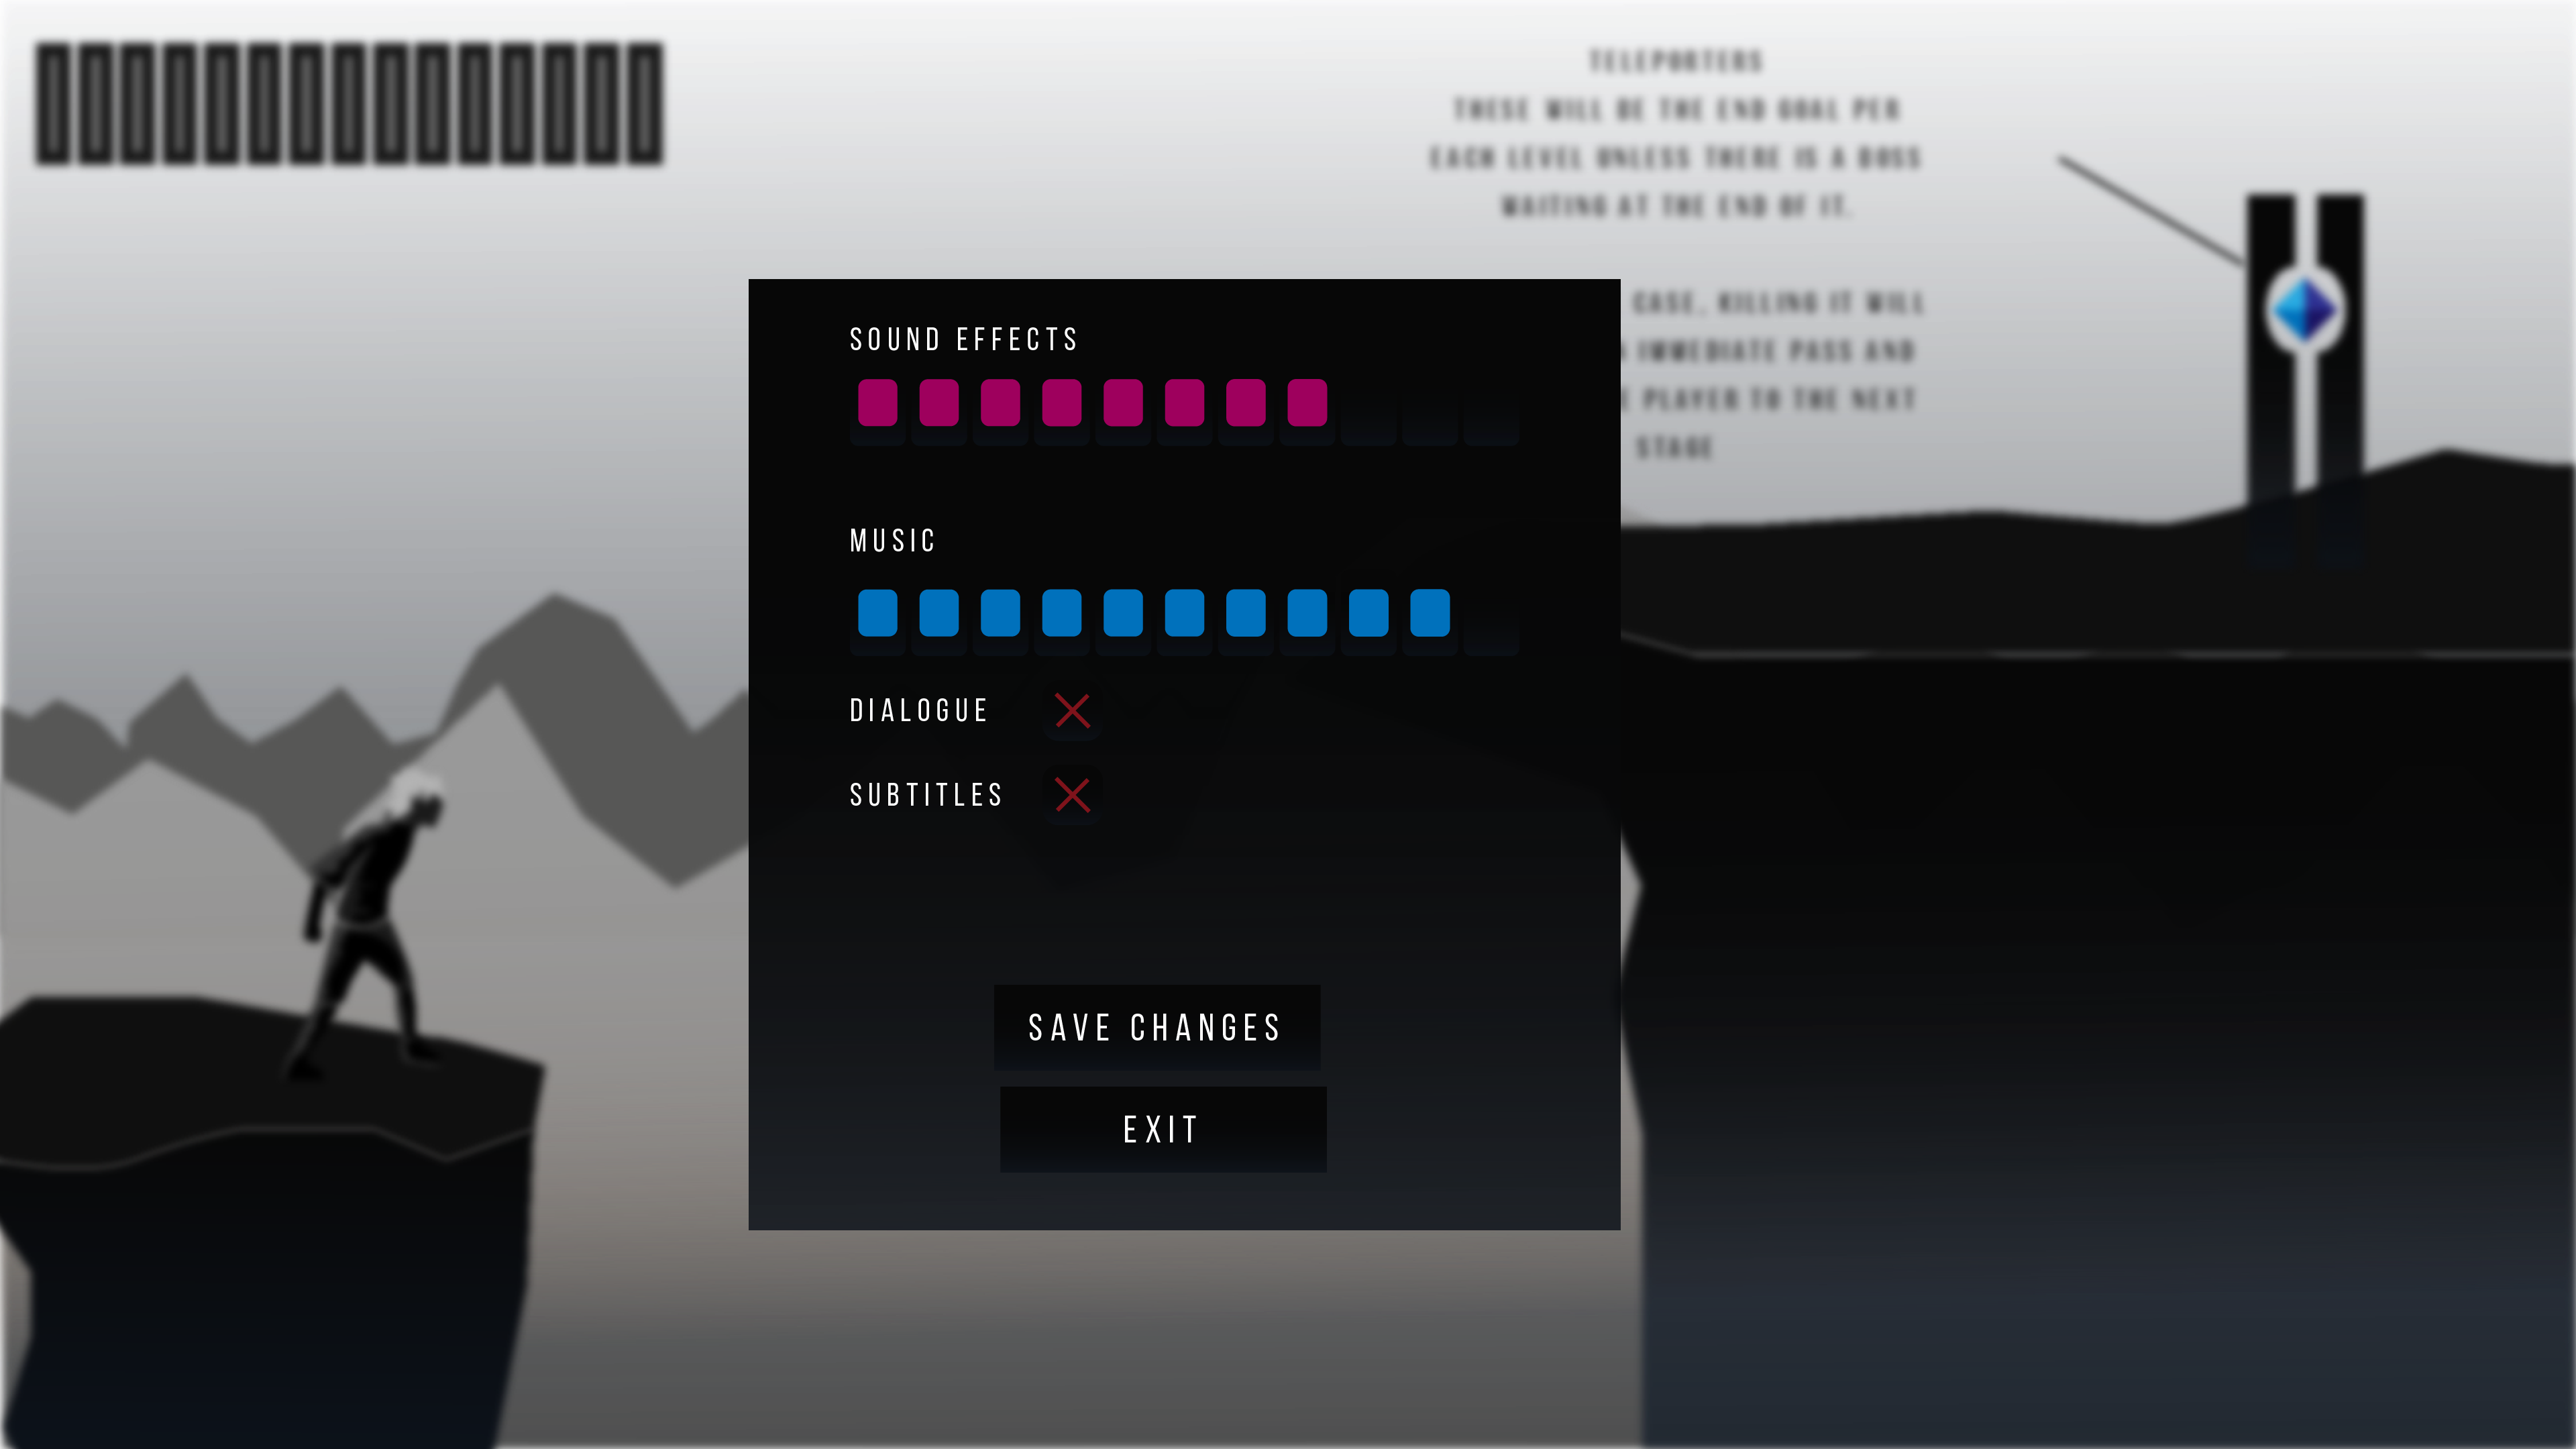
Main Menu & Pause Menu
- Options need to be added to main menu, and included onto the pause menu.
Scene Exit
- Scene exit and transition have to be built onto the teleporter (envisioned above) with prompt for trigger.
Actual Levels
Actual levels need to be built (here me out, 90% of all prefabs are done and it was necessary to do it this way with the inclusion of cross-referencing scripts and multiple objects being dependent on multiple objects with their own scripts to interact properly).
After the jump pad (might not include it, the player character is pretty nimble as it is), moving pad, and teleporter are prefabbed, it is literally drag and drop from here on out. Will take me no longer than a day to complete all levels and meet the playability criteria of the brief.
09/07/2020
So I’ve attempted to make a working two-way teleporter (scene management system), the previous one I built was only one way. It failed miserably. I’ve tried various way around it but to no avail, so I have gone back to my previous one-way system with an added notification on proximity that specifies whether or not you are going to the next level, which allows me to prefab another teleporter (with a slightly changed appearance) that can take a player to a previous level if they so choose. The only issue with this that I can foresee is that it will always drop the player at the start of the level (which is either a boon or a bust, depending on the players perspective, obviously there is no reason to go back other than to do a level over that the player found to be especially fun).
At the behest of the last lecture and the advice that has been given, that a pickup system for additional health is always a plus, I built one.
Also, having no lives remaining will (for now at least) chuck the player back to the start of the level he is already on, which is far from perfect, but for now that is all I can do. As for any other additionals that I am keeping in mind of, there is very little feedback to damage (aside from pushback, which doesn’t feel right because it automatically teleports the character a set distance instead of actually applying a force in the direction opposite of the damage source, which for now, is unchangeable) or healing, so I am taking a look at implementing camera-shake and if possible, add some particles into the mix which should provide additional feedback, but I’ll look at that once level building is over, which for now (today & tomorrow) is going to be my primary focus.
[A metric ton of time later, game finished, learned how to do a basic level of sound editing to create interesting sounds from less interesting ones, watched a couple of tutorials on how to create an audio manager in unity and how to put in the aforementioned sounds and music at specific times.]

Hey Hey Anton!
I hope you had a good rest and that you are ready to get cracking with the rest of your game.
These are starting to come together really solidly. The Idle looks sic – I do think you can make gifs of all the sequences – that would be a lot easier to see their movements completed?
Keep up the good work dude, I like where this is going.
LikeLike
Roger that, will get the gifs up asap,
LikeLike